Hey, fellow nail polish addicts! Happy December. My part of Illinois has had 40-70 degree weather for the past three or so days, and it feels nothing like winter here, but I still needed a nail design to suit the season! Behold, candy cane gradients!

My inspiration for these was actually pretty random. Has anyone seen that one blogger background with the gradient stripes? I saw that on another blog and thought, "hey. I'm going to recreate that on my nails." I was also determined to do a candy cane-themed manicure some time during winter, but didn't want to do the typical red and white stripes, so my brain just put two and two together and came up with candy cane gradient. Here's my tutorial!
You will need:
- Base coat
- Red polish
- White polish
- Scotch tape or striping tape
- Makeup sponge
- Top coat
Start of with a base coat- you know the drill! Then add your red polish. This one is Gogo Girl from Sinful Colors. I'm not a huge SC fan by any means, but this red is the perfect Christmas color. It's also a jelly, so bonus points there! And before I get any farther I'd like to apologize for the ugly shape of my first finger. It broke but was still attached by some threads, and I tried to glue it together, but it came off completely after a day or two *sigh* and I just couldn't bring myself to cut all of my nails down to even nubbins, so we're going to have to put up with seeing my sad broken nail for a while.
 |
| Sinful Colors - Gogo Girl |
Cut scotch tape into little thin strips and place them onto the nail, like in the picture below.
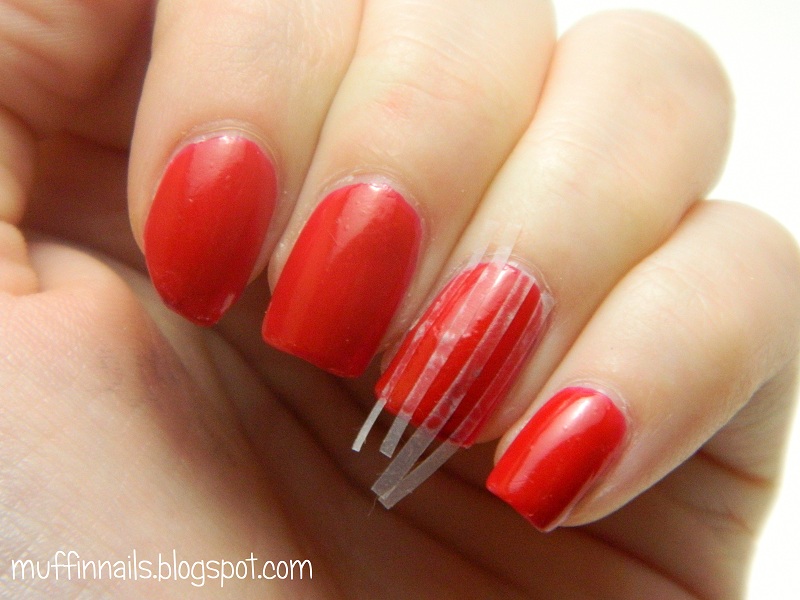
I wasn't able to photograph this complete step, because it was necessary to remove the tape quickly to prevent nail polish smudges, but I hope it's pretty easy to figure out. I put some of the white polish onto the makeup sponge, sponged a gradient on the nail with the tape, and peeled the tape off. And bingo, you have yourself a candy cane gradient!
 |
| Sally Hansen - Hard to Get |
That's all there is to it! You can repeat this on all of your nails or leave it on your ring finger as an accent. If you're prone to getting polish on your skin when you do gradients (AKA me), just use a small paint brush dipped into nail polish remover to clean it all up. Don't forget your top coat!
And there you have it! This one can be a little time consuming if you have to cut up the scotch tape and place it on each nail, so I'd recommend setting aside an hour to do this manicure, unless you have striping tape available. Show off your winter spirit with these bright candy canes, and make sure to eat some real ones while you're at it!
To see what tutorials I have in store for the rest of the holiday season, don't forget to follow here, 'like' on Facebook, and follow on Twitter.
Thanks for reading!
- Muffin
Love the use of tape!
ReplyDeleteI nominated you for the Liebster Award! Please check out my blog for further information! http://mittamean83.blogspot.com/p/liebster-award.html
Thanks, Melissa! I'll write the post ASAP.
Delete