Monday, December 24, 2012

Reindeer

Merry Christmas eve, everyone! And to those who aren't celebrating Christmas, happy late-December! This is my last Holiday themed post (aww) but I tried to make it a good one. I present to you: Reindeer nails!


You will need:
- Base coat
- White polish
- Light brown polish
- Black striper
- Dotting tool
- Dark brown polish
- Red polish
- Black polish

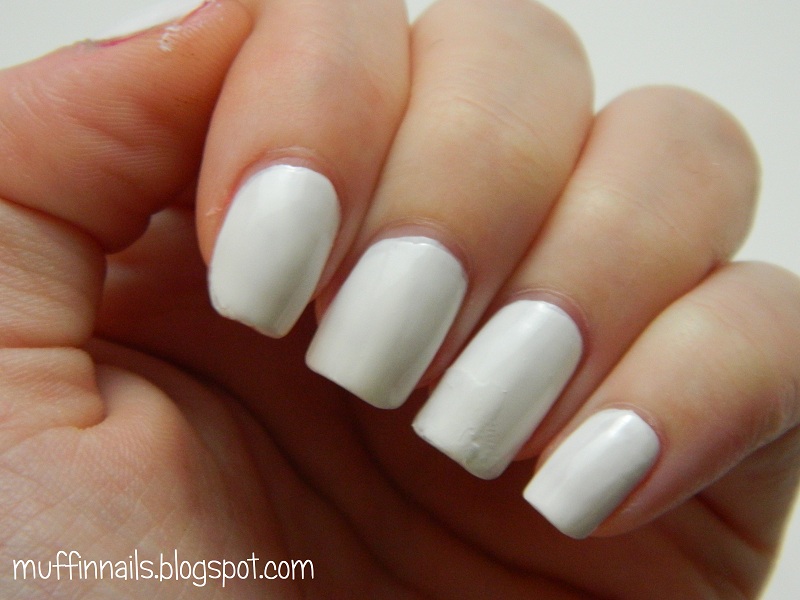
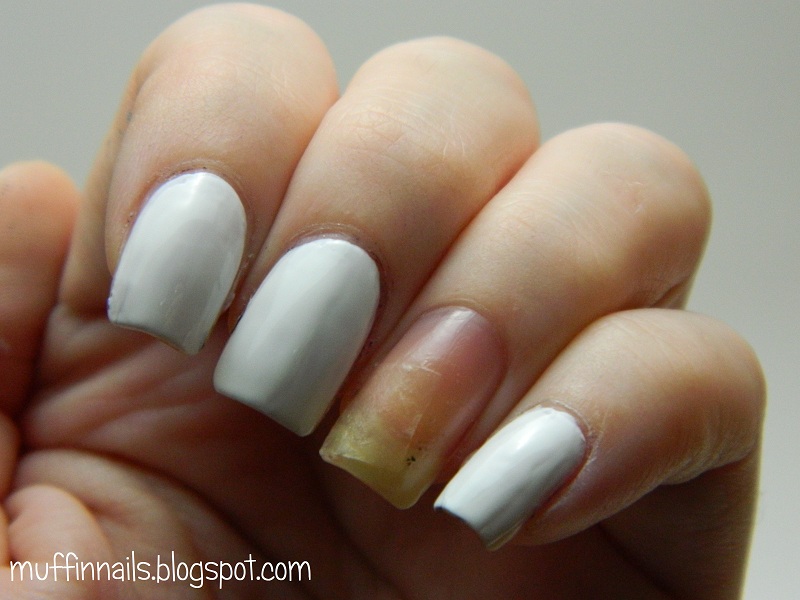
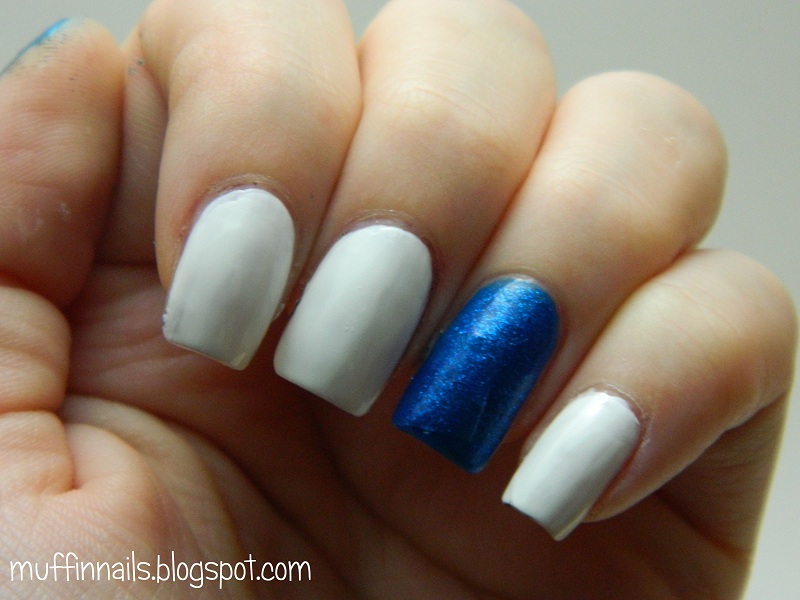
 Start off with a base coat, and then paint each of your nails white.

Sally Hansen - Hard to Get
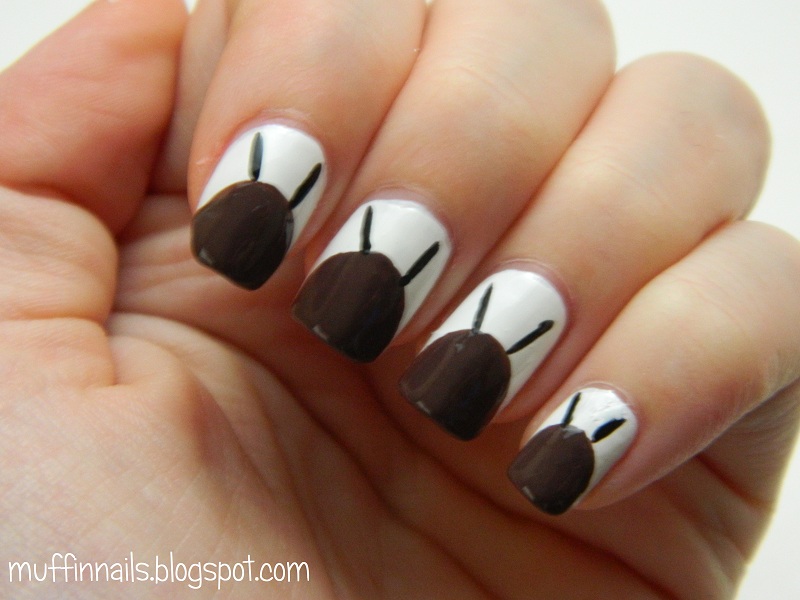
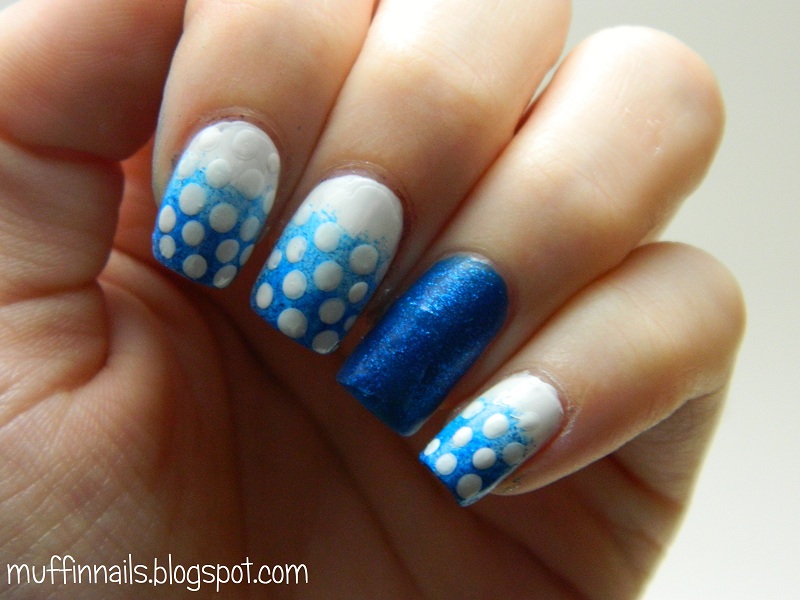
 Add little circles to the bottom half of each nail using the light brown polish.

China Glaze - Foie Gras
With the black striper, start with two stripes on each nail to create the antlers.

Art Deco striper - Black
 Draw a few lines coming out from each antler to complete the look.


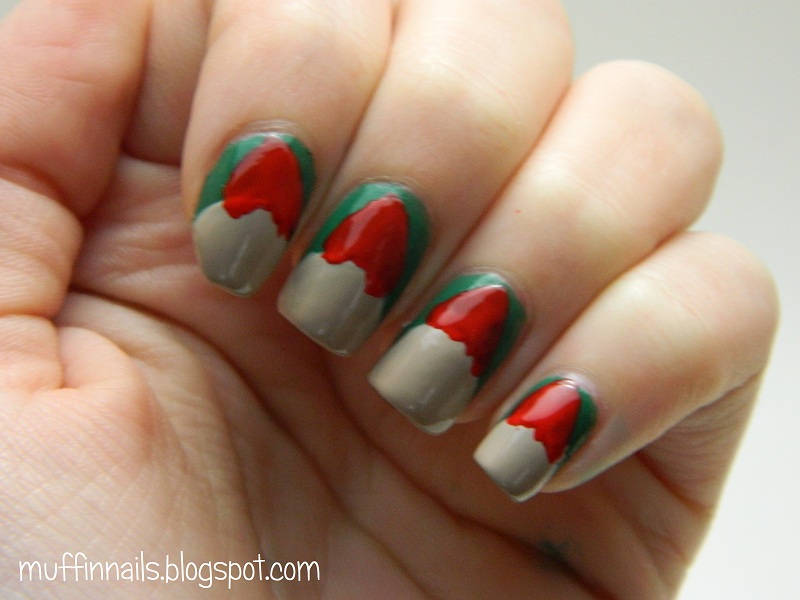
With the dark brown polish and dotting tool, add little brown noses to each reindeer but the accent nail.

Essie - Little Brown Dress
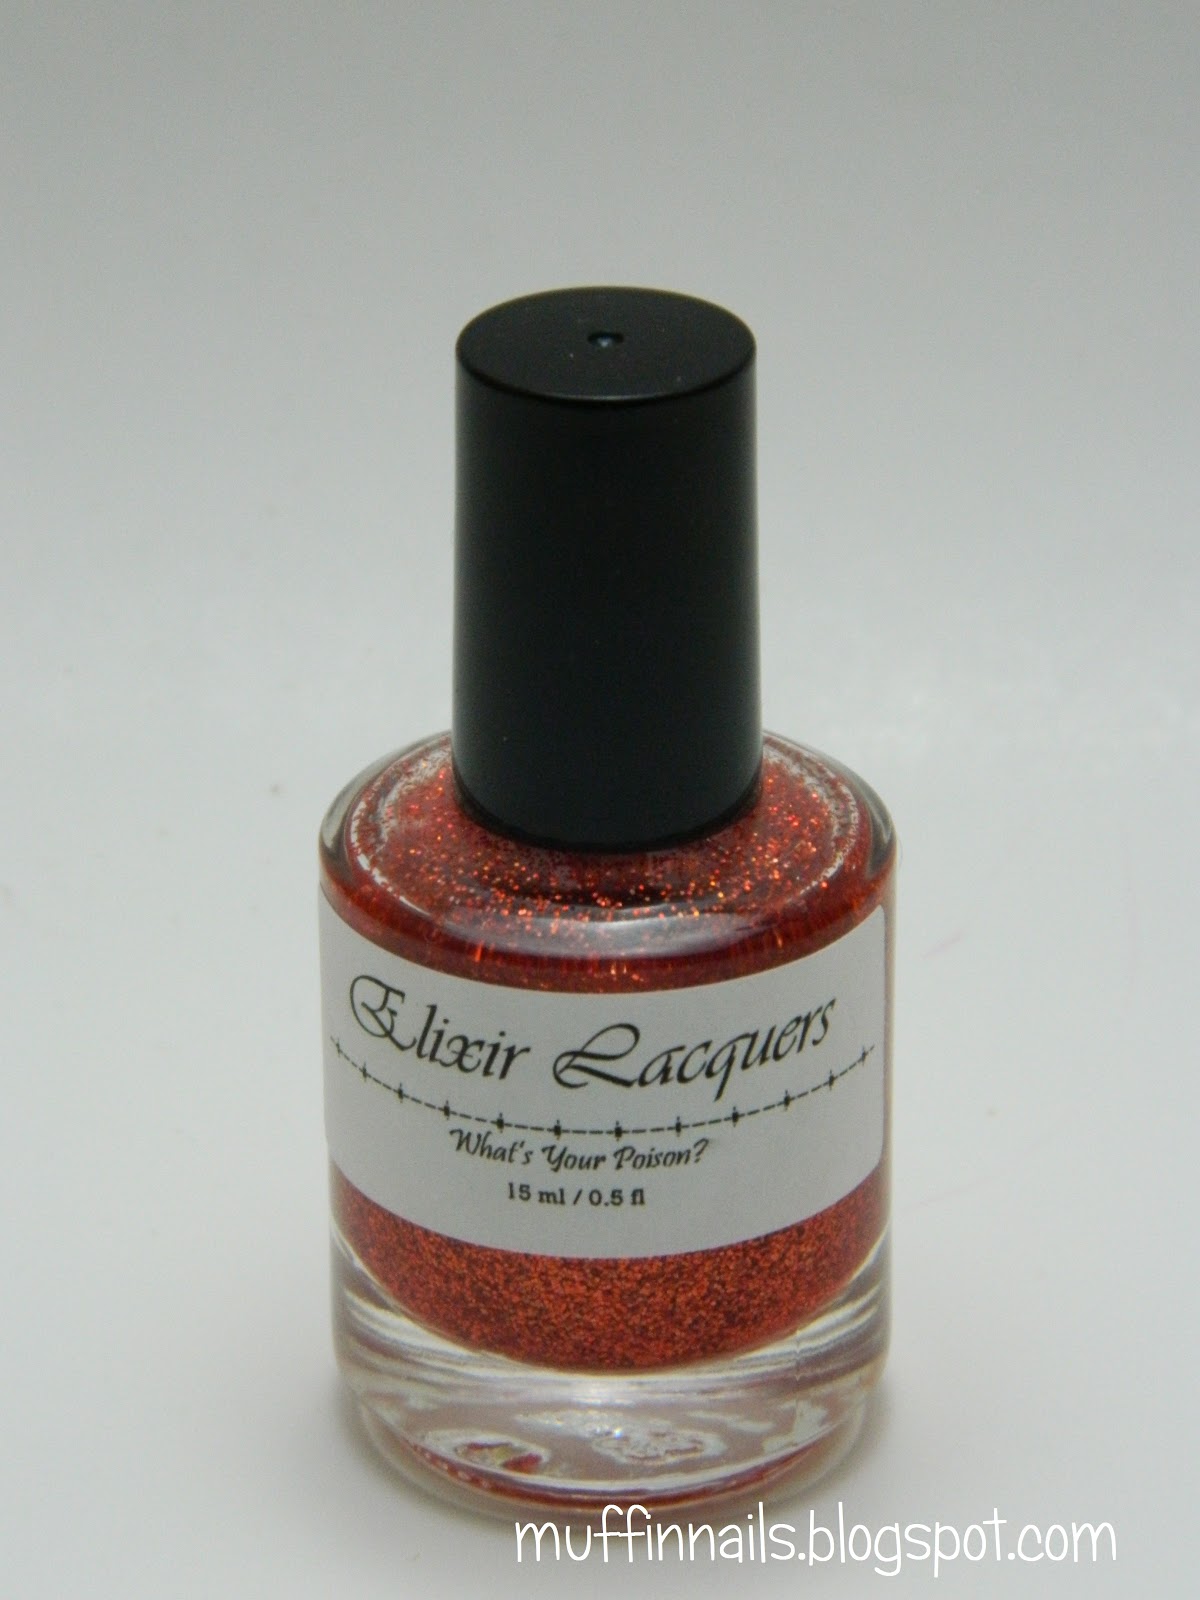
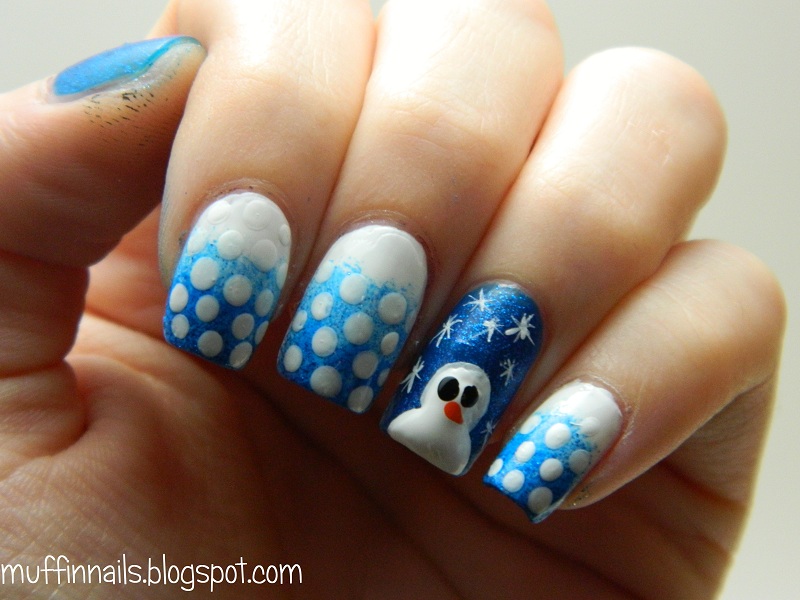
 For the accent, use the red polish and dotting tool to create Rudolph's nose.

Rimmel - Blood Red
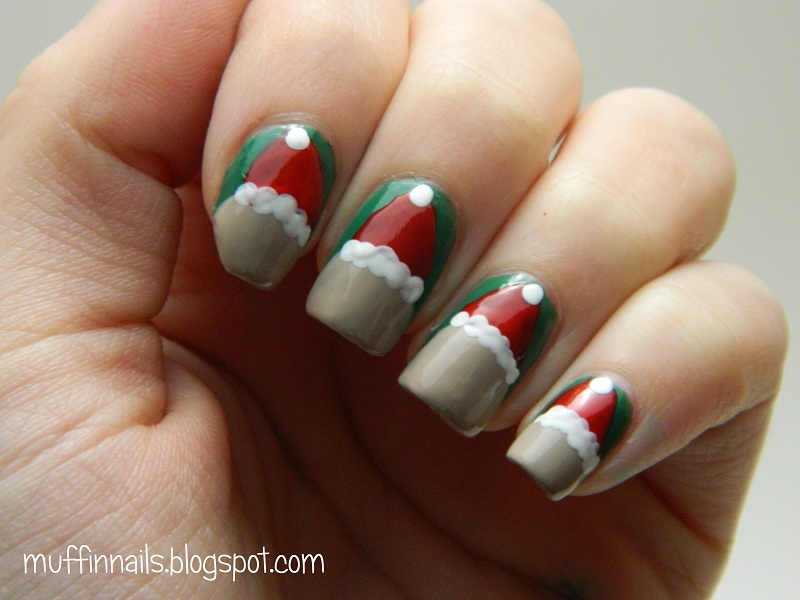
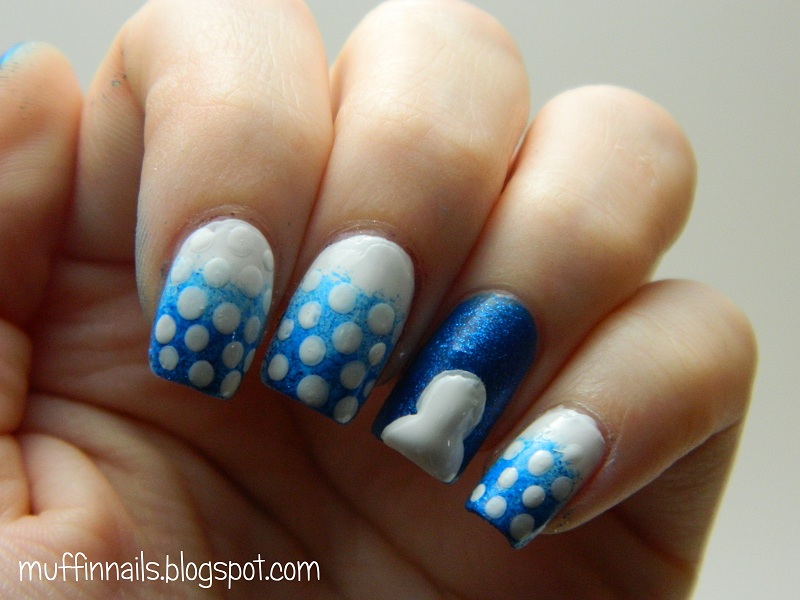
 Using the white polish and dotting tool, start the eyes.


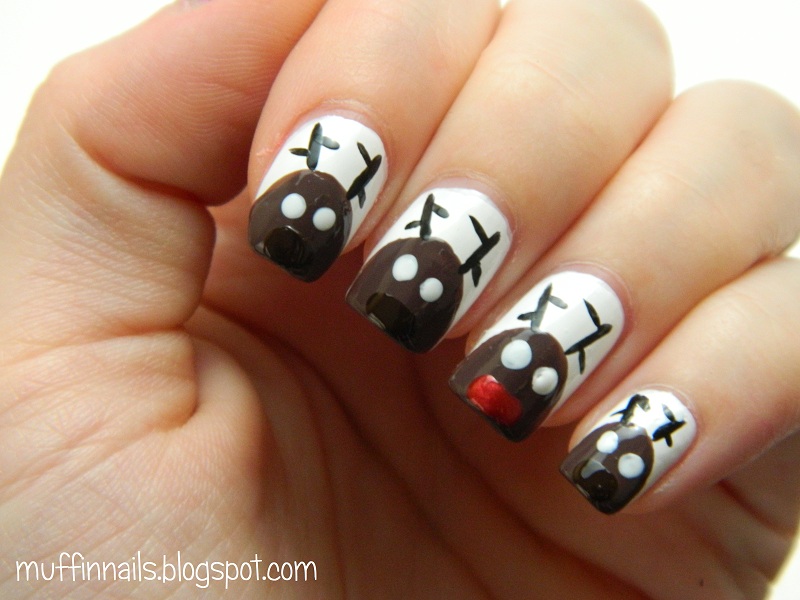
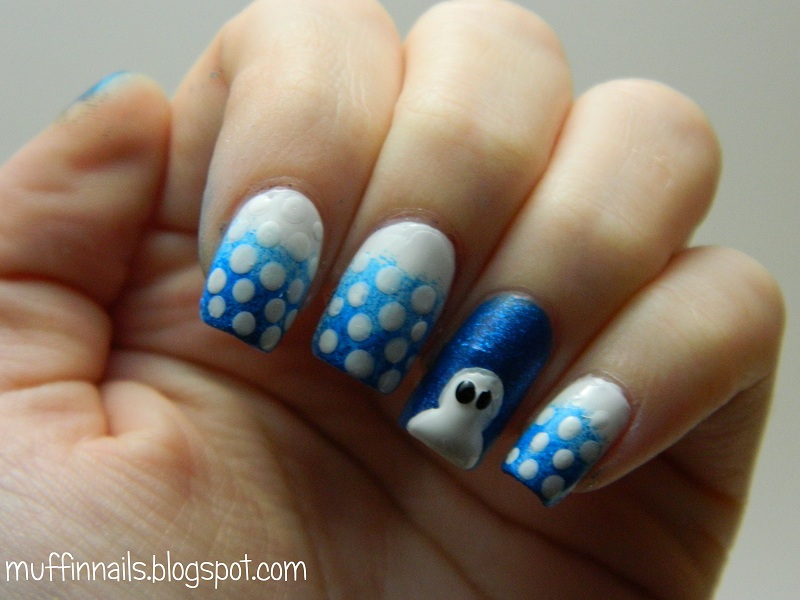
Add a small black dot within each eye using the dotting tool once more.

Sally Hansen - Black Heart
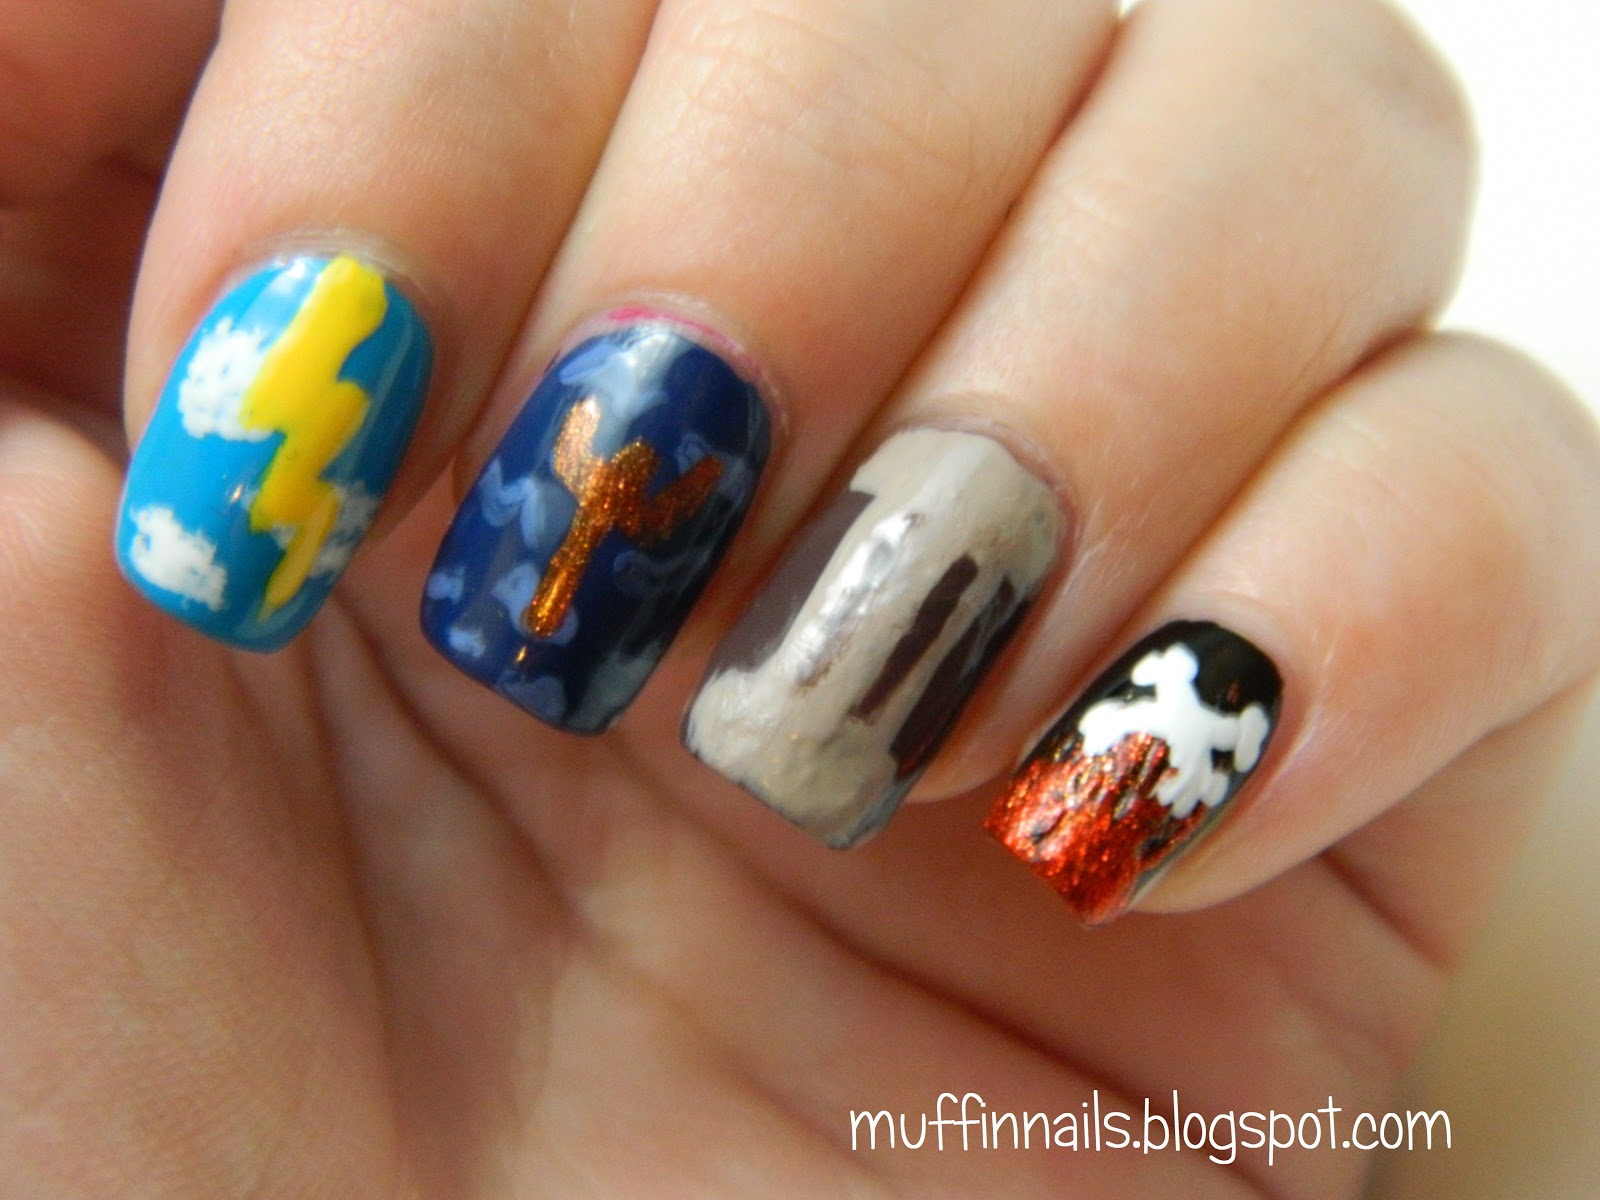
At the last second, I decided to add some little ears to each reindeer. You can do this with a toothpick, small dotting tool, or just the polish brush.


There you have it! You can go ahead and add a top coat, but my camera decided to die on me before I had time to add one myself, and I was too lazy to take pictures afterwards (hehe, sorry!). But these nails are extremely easy, and they're great conversation starters. 
To stay tuned for my upcoming tutorials don't forget to follow here, 'like' on Facebook, and follow on Twitter. Thanks for reading, and have a wonderful holiday!
- Muffin

Thursday, December 13, 2012

Santa Nails

So Christmas is quickly approaching, and you have NO idea how you're going to paint your nails for the big day! You need something quick, easy, and sure to spread holiday joy - Santa Claus!


You will need:
- Base coat
- Green polish (or base color of your choice)
- Tan/skin tone polish
- Red polish
- White polish
- Dotting tool
- Top coat

Start off with a base coat, as usual! Then paint down a layer or two of your base color. I chose green because I thought it would look very Christmas-y with Santa's red hat, but you could really do anything. Since most of the base color will be covered up by the end, it doesn't need to be perfect, but make sure that it's solid. (Don't skimp on the extra coats!)

Sinful Colors - Envy

Now for Santa's head. Using a skin-toned polish, paint a nice little circle/semi-circle around the tips of the nails. The circle should go about halfway up each nail.

Essie - Sand Trapez

Next, it's time for the hat. Using a red polish, paint a hat-shaped triangle on the top of each Santa head. The point and the base don't have to be perfect; they'll be covered up with white polish later.

Kiss Colors - True Red

Using your dotting tool, add a dot of white to the top of the hat and across the base of the hat.

Sally Hansen - Hard to Get
 Now add the beard, using the white polish and dotting tool again. I had to try a couple different things before I was truly satisfied with how the beards looked, so I'd suggest testing them on a note card before painting them onto your nails.


Using the dotting tool and black polish, dot on two eyes. Make sure they're not too big, like they were on my pinkie nail- I got a bit carried away with the dotting tool! Try to aim more for what the eyes look like on my ring finger.

Sally Hansen - Black Heart
Using the red polish again, dot on little noses for each Santa. Add a top coat and you're good to go!


Although Christmas is two weeks away, spread some holiday cheer early with these festive Santa nails. If you don't celebrate Christmas, you could easily turn these into cute gnomes by switching up the colors (although, I'll admit, gnomes don't really go with the season, but if you really wanted to...). 
If you'd like to see my upcoming Holiday-themed tutorials, make sure to  follow here, 'like' on Facebook, and follow on Twitter.
Thanks for reading! Happy holidays!
- Muffin

Wednesday, December 5, 2012

Candy Cane Gradient

Hey, fellow nail polish addicts! Happy December. My part of Illinois has had 40-70 degree weather for the past three or so days, and it feels nothing like winter here, but I still needed a nail design to suit the season! Behold, candy cane gradients!


My inspiration for these was actually pretty random. Has anyone seen that one blogger background with the gradient stripes? I saw that on another blog and thought, "hey. I'm going to recreate that on my nails." I was also determined to do a candy cane-themed manicure some time during winter, but didn't want to do the typical red and white stripes, so my brain just put two and two together and came up with candy cane gradient. Here's my tutorial!

You will need:
- Base coat
- Red polish
- White polish
- Scotch tape or striping tape
- Makeup sponge
- Top coat

 Start of with a base coat- you know the drill! Then add your red polish. This one is Gogo Girl from Sinful Colors. I'm not a huge SC fan by any means, but this red is the perfect Christmas color. It's also a jelly, so bonus points there!
And before I get any farther I'd like to apologize for the ugly shape of my first finger. It broke but was still attached by some threads, and I tried to glue it together, but it came off completely after a day or two *sigh* and I just couldn't bring myself to cut all of my nails down to even nubbins, so we're going to have to put up with seeing my sad broken nail for a while.

Sinful Colors - Gogo Girl

 Cut scotch tape into little thin strips and place them onto the nail, like in the picture below.


I wasn't able to photograph this complete step, because it was necessary to remove the tape quickly to prevent nail polish smudges, but I hope it's pretty easy to figure out. I put some of the white polish onto the makeup sponge, sponged a gradient on the nail with the tape, and peeled the tape off. And bingo, you have yourself a candy cane gradient!

Sally Hansen - Hard to Get

That's all there is to it! You can repeat this on all of your nails or leave it on your ring finger as an accent. If you're prone to getting polish on your skin when you do gradients (AKA me), just use a small paint brush dipped into nail polish remover to clean it all up. Don't forget your top coat!


And there you have it! This one can be a little time consuming if you have to cut up the scotch tape and place it on each nail, so I'd recommend setting aside an hour to do this manicure, unless you have striping tape available. Show off your winter spirit with these bright candy canes, and make sure to eat some real ones while you're at it!
To see what tutorials I have in store for the rest of the holiday season, don't forget to follow here, 'like' on Facebook, and follow on Twitter.
Thanks for reading!
- Muffin

Thursday, November 29, 2012

Winter Snowmen

Hello, nail polish lovers! You wouldn't believe what I had to go through to get this post up today. Apparently Blogger's got this cap on the amount of pictures that can be stored in your account, and I'd met the limit. Either I pay for more space (and I really don't have the money for that, so it was out of the questions) or stop adding pictures. I spent a while googling it and discovered that as long as the shortest side of each picture is 800 pixels or less, it's not included in the data limit. So hooray! After that it was a matter of re-sizing all of the pictures. But it all worked out in the end, even though today's a bit late, so here's this week's tutorial.

Since it's past Thanksgiving, it's time to start the holiday manicures. And since there are so many ideas to try out, I figured I'd better start as early in the season as possible! So I present to you: Snowman nails!


You will need:
- base coat
- white polish
- blue polish
- black striper
- white striper
- orange striper
- top coat
*Note: All of the stripers can be replaced with the same color of polish and a toothpick.*

Start off with a base coat, and then paint all but your thumb and ring finger white. Sorry for the ugliness that is my ring finger- it's torn halfway across the nail but I can't stand to cut it, so as of now I'm holding it together with a tea bag patch.

Sally Hansen - Hard to Get

Then add the blue polish to the thumb and ring finger.

China Glaze - Blue Sparrow

The snowman is my tutorial part for this, and so for the rest of the nails, I followed a tutorial by Cutepolish, using the blue that was used on the accent nails as the gradient color. I have pictures of the steps below, but all credit for the idea goes to Cutepolish, of course!


Now comes my part. Start off with a semi-circle at the base of the nail in white, and add a circle on top of it for the head. You can use either a striper, dotting tool, or toothpick for this- whatever works best for you. I used a striper on my left hand but since my left hand isn't as steady of a painter, I used a dotting tool to paint the right hand.

Art Deco - White

Using the black striper, paint on two black eyes.

Art Deco - Black

Now add the nose in orange. I suggest placing a dot with the striper/toothpick/etc. and then dragging the orange across the nail a bit instead of trying to paint a tiny triangle. And just to have some fun, I used a white striper to add some snowflakes above the snowman. All they are are eight white lines crossing each other to form a little star-like thing.

Sally Hansen - Sun Kissed

Don't forget to add a top coat at the end!


And that's it! This winter-themed manicure is easy, quick, and oh-so-cute. Show your love of the season with these cheerful snowmen on your nails!
If you'd like to see more of my winter nail art tutorials, make sure to follow here, 'like' on Facebook, and follow on Twitter
Thanks for reading!
- Muffin

Friday, November 23, 2012

Swatch: Elixir Lacquers - Miss Kitty's Mee-Yow

Welcome to part two of my Elixir Lacquers reviews! I recieved both Red Nose and Miss Kitty's Mee-Yow from Erica over at Erica's Nails and More from her first Nail Art Challenge. If you haven't seen my post from last week about Red Nose, here it is!

And here is Miss Kitty's Mee-Yow. It's a purple polish with a blue shimmer.


I expected the polish to be much more purple, but the blue shimmer was very noticeable. Application was great. You definitely need three to four coats to get a solid color, though. From left to right, here's one, two, and three coats.


I wasn't so sure about this polish, but it really started to grow on me. I took it off pretty fast, though, and I think I should have left it on longer to see if I'd like the color even more as time went on.
I was really hoping Miss Kitty would be one of those colors that can be layered over anything, but I was a bit wrong on that. I tried it over Essie - Sexy Divide, hoping to add some shimmer to the already-purple color, but this happened instead. Turns out, that blue really shows over darker colors. It's actually a really pretty color, but it just wasn't what I was going for.


And a shot of the bottle:


I think this picture captured a bit more of the shimmer. Certain angles in the light really make it appear more blue.


Shh, don't tell anyone... I think I forgot one coat on my first two fingers. Woopsies! The first two fingers are two to three coats, and the last two are three to four. There are no undies, and I used Sally Hansen's strengthening top coat on top to add some more shine.


There you have it! Miss Kitty's Mee-Yow can be found at Elixir Lacquer's website, along with a bunch of other beautiful polishes, including Red Nose. To stay tuned for all I have in store, don't forget to  follow here, 'like' on Facebook, and follow on Twitter
Thanks for reading!
- Muffin

Wednesday, November 14, 2012

Swatch: Elixir Lacquers - Red Nose

If anyone remembers, I won some nail polishes from Erica's Nails and More Nail Art Challenge a few weeks back. One of those polishes happened to be Elixir Lacquers Red Nose, and I just had to swatch it for you guys.
(Note: Elixir Miss Kitty's Mee-yow was the second polish I won - you'll be seeing a swatch of it next week!)

Here's the polish as I'm currently wearing it. This is three to four coats under a top coat on each nail, with no undies. The photo was taken using artificial light.


Before I get on to the review part of this, I'd like to let you guys know that I really don't like glittery polish. I know, it's pretty, blah, blah, but it just never does anything for me. You can't work it in to nail art most of the time, which means I won't be using it  most of the time.
That aside, I am so in love with this polish. I keep catching myself getting distracted and staring at it for a minute or two. It's too beautiful for words and the pictures only captured a small part of how amazing it is.
Application was great. It took a couple of coats to build up the color, though, so I'd suggest using a nice tan or gold creme as some undies. Just to show you the thickness of the glitter, I have the picture below. From left to right, I have one coat, two coats, and then three coats. One was extremely patchy. Two was much better, but still had a few empty spots. Three seemed to just about do it, but there were some tiny patches on  a few nails that I touched up with a fourth coat.


I couldn't get any picture to show the full glittery goodness of Red Nose, but this one captures a bit of it.

I hate how flash looks with nails, but I felt that the color looked a bit more accurate here, so here's a picture of Red Nose under flash. Like I said, the color is a tiny bit more accurate, but the flash also makes it look much duller than it is in real life. 


And just because I was having fun experimenting with my light box, this is the bottle. Look at all that wonderful glitter just begging to be painted onto nails. 


There you have it! All in all, I would definitely recommend Red Nose. It's unbelievably beautiful and I've never quite seen another polish like it. If you're interested in buying Red Nose or any of Elixir Lacquer's polishes, they can be found at their website
To stay tuned and read my review of Elixir Lacquer's Miss Kitty's Mee-Yow, make sure to  follow here, 'like' on Facebook, and follow on Twitter
Thanks for reading!
- Muffin


Friday, November 9, 2012

My Homemade Light box!

Hey, guys! So for the past few months, my photos have all been taken the same way. I open the blinds to let natural light in, hold my hand up in front of a wall, and snap a picture with my trusty camera. Now that's all fine and dandy in the summer, when there's plenty of natural light for me to take advantage of, but now that it gets dark out at who-knows-how-early, I'm finding it harder and harder to get my photos in before the sun is gone and I have to rely on flash (eek).

So I needed a solution, fast. My camera is extremely touchy and if it doesn't have PERFECT lighting, the shutter speed slows down and my pictures come out blurry. I found the perfect way to fix my problem:
this light box tutorial by Chalkboard Nails.

For all of you out there that don't know what a light box is (AKA me until I stumbled upon this tutorial), it's basically a simple box that allows light in for nice clean pictures. I looked up some actual light boxes online, and they are by no means cheap, so I knew that I'd actually have to get off my lazy butt and make something myself if I wanted a nice light box. I gathered my supplies and went to work.

The building of the box was pretty easy- by far, the hardest part for me was finding the right sized cardboard box. I'm not going to go through all the steps (Sarah at Chalkboard Nails explains it way better than I'll ever be able to), but I think you can see the basic idea from the picture below.


Here's my finished box! I was a bit lazy and never cut off two of the side flaps, but I figure that I'll get to it eventually. I also need to cut off the sides of the actual box and put tissue paper over them as well, but I was really hurrying to get this done and skipped that step.


What do you think of my picture quality? I'm really shocked with the difference between this and the photos I took just a couple weeks ago.


I definitely need to work on hand positions and angles. I usually stick my arm through the legs of my tripod to make sure my hand is straight up in my pictures (if that makes any sense) but my tripod's too tall to use with the light box so I had to improvise. I propped the camera up on some books and had to put my hand in from the side and tilt it. I also had some funky shadows (in the lower right corner) and I need to learn to angle my hand so that it doesn't happen.

I was having so much fun that I couldn't just take one picture. So I took out some pretty polishes and took pictures of them in the light box too.


And I'm guessing I should explain the nail design, too. So I'm a pretty big geek, and I love Roman related stuff. The mythology is so fascinating and the Latin language is really amazing. I created these for a Roman-themed art contest.


The first nail is based off of Jupiter (Zeus), who I represented with his symbol, lightning.


The second nail is Neptune's (Poseidon's) trident. It looks a bit like a cactus, but hopefully no one cares too much.


The third one is my accent nail, which is supposed to be a Roman-style column. I tried this one three or four times and kept messing up, so I know it could be better, but this is really all I had the time (and patience) to do.


The last nail was the one I had trouble coming up with a concept for. I wanted it to be based off of Pluto (Hades), but I couldn't think of a simple, easily recognizable symbol for him. I eventually settled on fire and bones, but I'm not too happy with how they came out.


What do you all think about the light box idea? Would you try it out yourself? Post your opinions in the comments! If you want to see more of my posts in the future, don't forget to follow here, 'like' on Facebook, and follow on Twitter.