Wednesday, October 31, 2012

Boiling Cauldrons

Happy Halloween! I hope you all are having a fun and safe holiday. And whether you're trick-or-treating, handing out candy, or just spending a quiet night at home, this design is perfect for Halloween. This post also happens to be my 50th post (wow, seems like just a week ago I started this blog!), and I really wanted to do something special. I was inspired by a spooky bubbling witch's cauldron, and couldn't help but find out what it would look like on my nails! So I hope you enjoy this creepy (yet fun) nail art design. 


You will need:
- Base coat
- Brown polish
- small gem bead... things
- Green polish
- Makeup sponge
- Black striper
- Topcoat

Start of with a base coat, as usual. Next, paint your ring finger and thumb brown.

China Glaze - Foie Gras

Add a drop of top coat onto the place you'd like the "bubble" to be, place the bead on top of it, and press it in firmly. Repeat for all of the bubbles you'd like. Try using some different sizes of gems to make it more realistic.


Paint over the beads with a base coat/ top coat (this step isn't pictured). Then cover it all up with a nice slime green (See what I did there? Slime? Lime? Slime? No? I thought it was funny).

Essie - Mojito Madness

Repeat for the rest of your nails (excluding the ring finger and thumb, of course).


Do a simple gradient on the brown ring finger. You can also do this on your thumb, but lazy me decided not to.


Time to start making the cauldron! Using a black striper, draw a line not quite reaching the sides of your nail. The line can be centered on the nail or slightly lower than the center.

Art Deco Black

Make the cauldron shape with the striper and fill it in.


Add a little handle to the cauldron to finish it up.


Top it all off with a top coat, and your spooky bubbling nails are done!


Prepare for all sorts of comments on these nails as you show off your Halloween spirit (and don't be afraid when you hear "gross" as often as "cool!"). If you decide to try these out, show me those pics by emailing me or posting them on my Facebook page- I'd love to see them! 
I hope you all enjoyed my fiftieth post. It's been such a fun journey getting here and I know that this is just one small milestone in many to come. If you want to see more posts from me in the future, don't forget to follow here, follow on Twitter, and like on Facebook
Happy Halloween, 
Muffin

Wednesday, October 24, 2012

Beauty Bloggers VoxBox

Hey, guys! I hope you're all having an amazing week! Today have a different post than usual for you all. A while ago I signed up for 
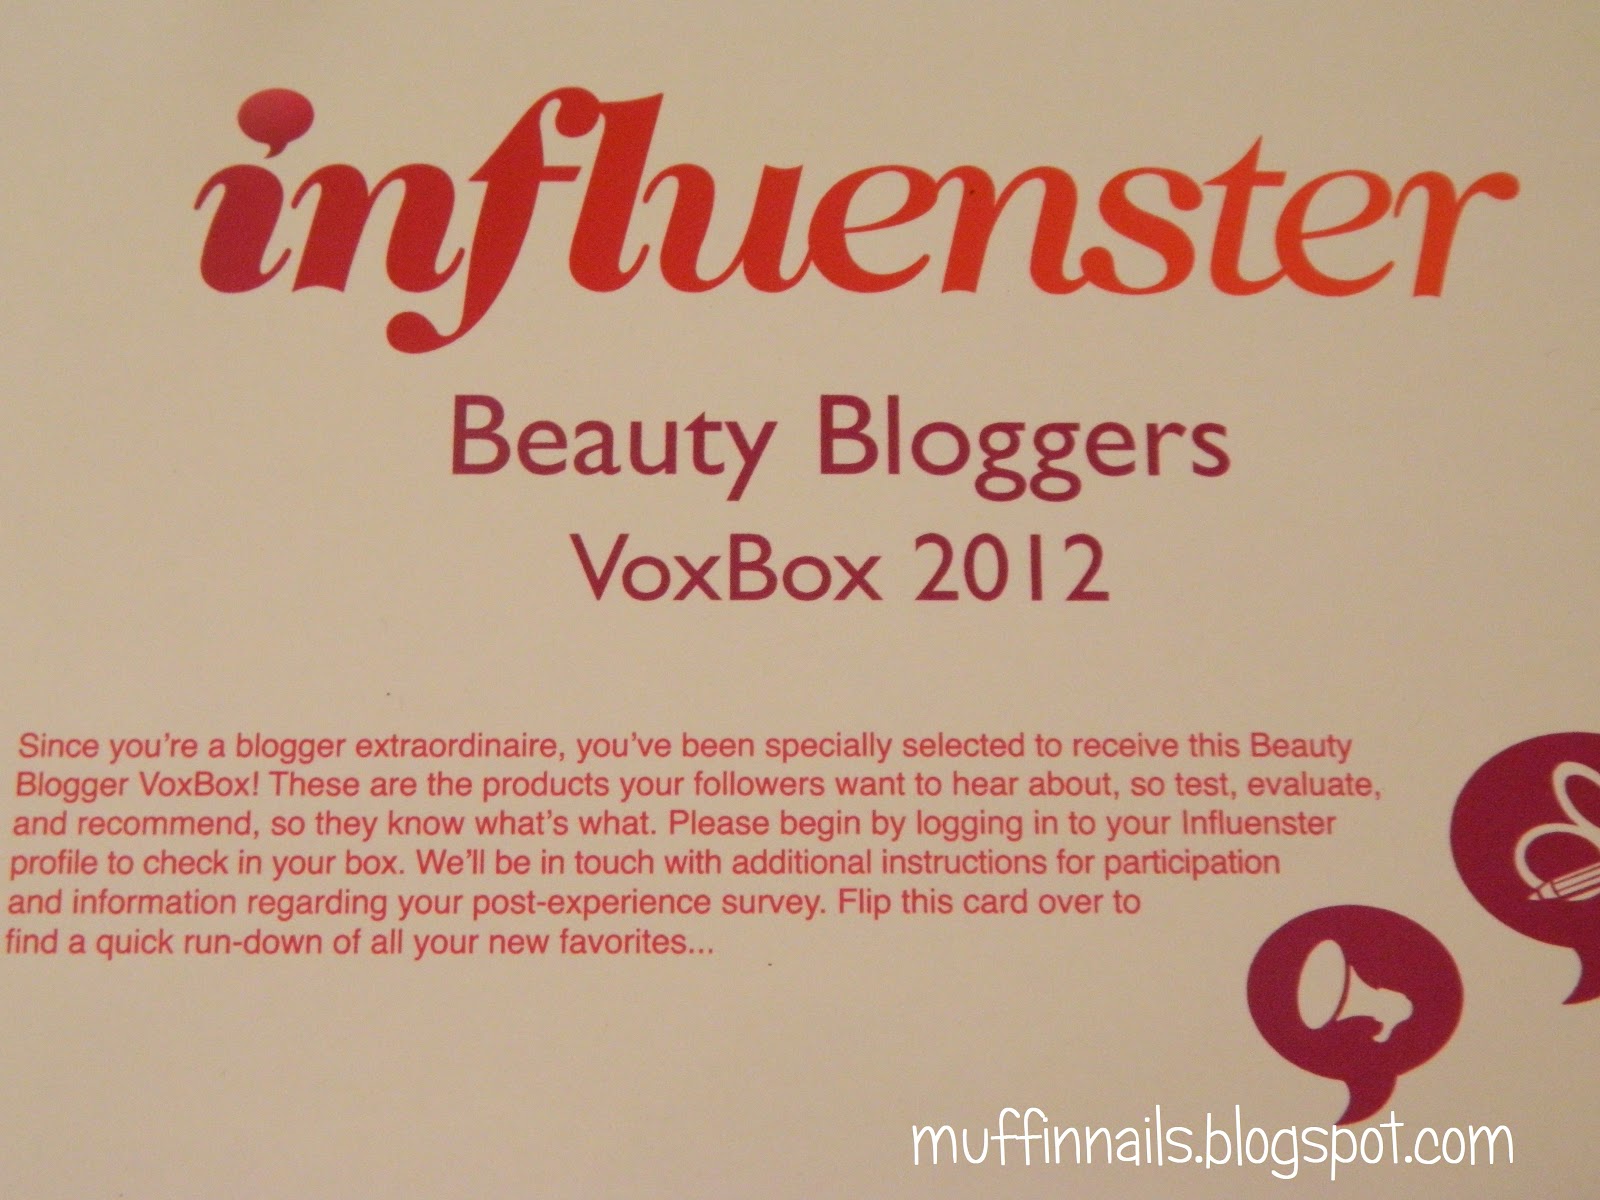
Influenster, a wonderful little website for reviewing products. You put in your interests and fill out some surveys, and if they decide that you qualify, you'll be sent a box of goodies to review. 

I decided to just try it out, even though I was pretty sure I wouldn't get any boxes. But a month or so ago I discovered, to my excitement, an email from Influenster saying I'd qualified for the Beauty Bloggers VoxBox! 
My box arrived a few weeks ago, and was just like a second Christmas! I tore open the packaging and ravaged through the box. Ready to hear about what all I received?

NYC New York Color IndividualEyes Custom Compact
Retail Price: $4.99


I'm not really a makeup person, so I don't quite know what makes a good or bad eye shadow. I diligently tried it on, though, and I really liked the shades, and had no trouble with anything. So A+ in my book!

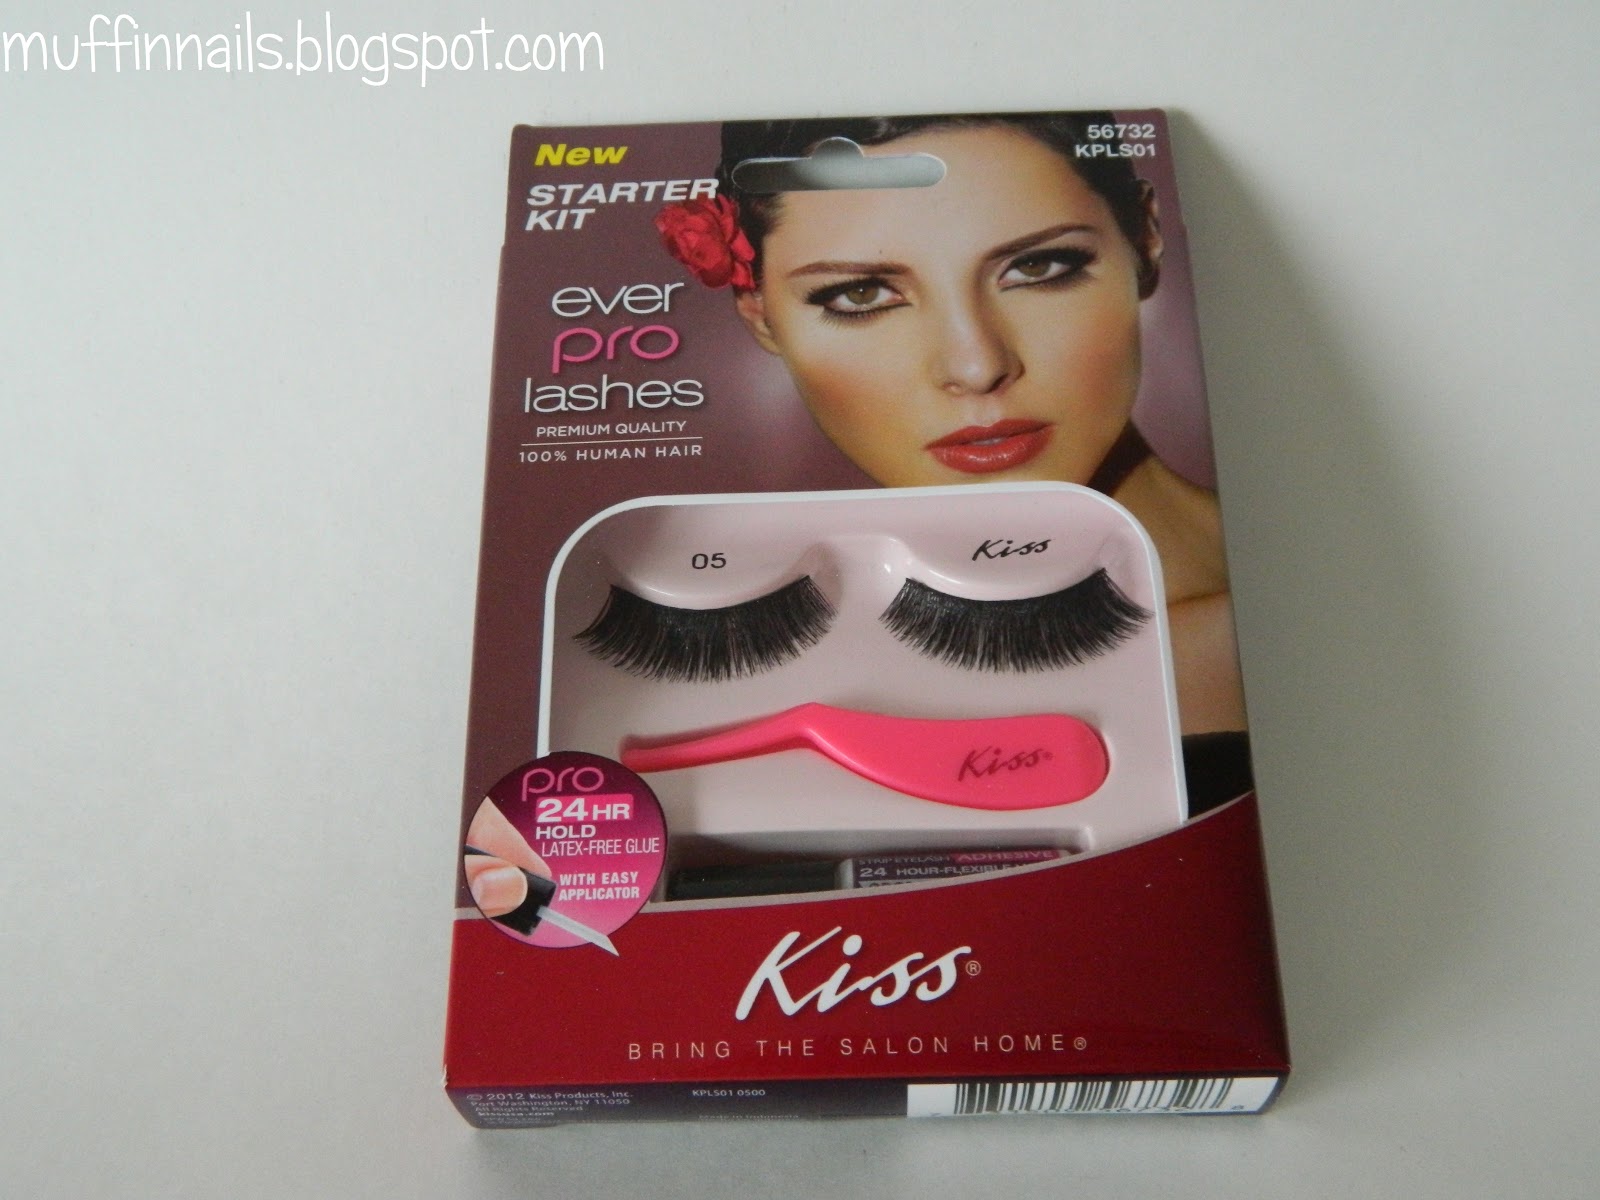
Kiss Ever Pro Lashes Starter Kit
Retail Price: $5.99


Remember how I said I'm not a makeup person? This specifically applies to false eyelashes. Don't get me wrong, I know some women can pull them off fabulously, but I just find them extremely tacky. We already have eyelashes. Why in the world would we need fake ones too? So I haven't tried this product yet (and probably never will) but I'm hunting around to find someone to review them for me.

Bath & Body Works Mini Candles
Retail Price: $3.50


I'm pretty sure they sent out a bunch of different scents for this one, and I got Pumpkin Cupcake. I love the smell of pumpkins, and the smell of cupcakes, so I was pretty darn excited about this one. I really only have good things to say about it. The pumpkin smell does overpower the cupcake one a bit, so know when you buy it that it's mainly a pumpkin-scented candle. I know not all people like the pumpkin smell, so if you're one of those people, don't get this one thinking you'll still enjoy the cupcake part of it- there's not too much cupcake scent to enjoy.


And this is pretty unrelated, But I thought it was funny. There was this little plastic packaging lid thing covering the candle, and apparently Bath & Body Works thinks us candle-buyers are pretty slow- they actually had to tell us to take off the plastic before lighting the candle? Wow. I never would have figured THAT out on my own! Thanks for the heads up (sarcasm alert)!

EBOOST
Retail Price: $28 for box of 20 effervescent powders, $39 for box of 30 effervescent powders, $39 for box of 12 shots


I wasn't really sure about this product. I was terrified it would get me a sugar-high feeling and then I'd crash a few hours later. And that's never fun. But I woke up one morning with loads of stuff to do and not enough energy to get it all done. That's when I decided to test this one out.
I poured a medium-sized glass of water, ripped open the packet, and poured the powder in. I was glad I'd used a large cup and filled it up halfway, because this stuff bubbled up at the top, and if I'd been using a smaller glass it would have overflowed for sure.
I'm not a fan of orange-flavored things, but I was still expecting something... better. Maybe it would taste like a nice orange soda or something. Boy was I wrong. I don't quite know what it was, but this thing tasted disgusting. There's no way I would make myself drink a glass of it every day. 
It took a half hour or so but I dutifully downed the entire glass. And I really didn't notice any change in anything. I wasn't more peppy or energetic or anything. Maybe it works like cold medicine, where the effects happen without you noticing, but I'm not too sure.


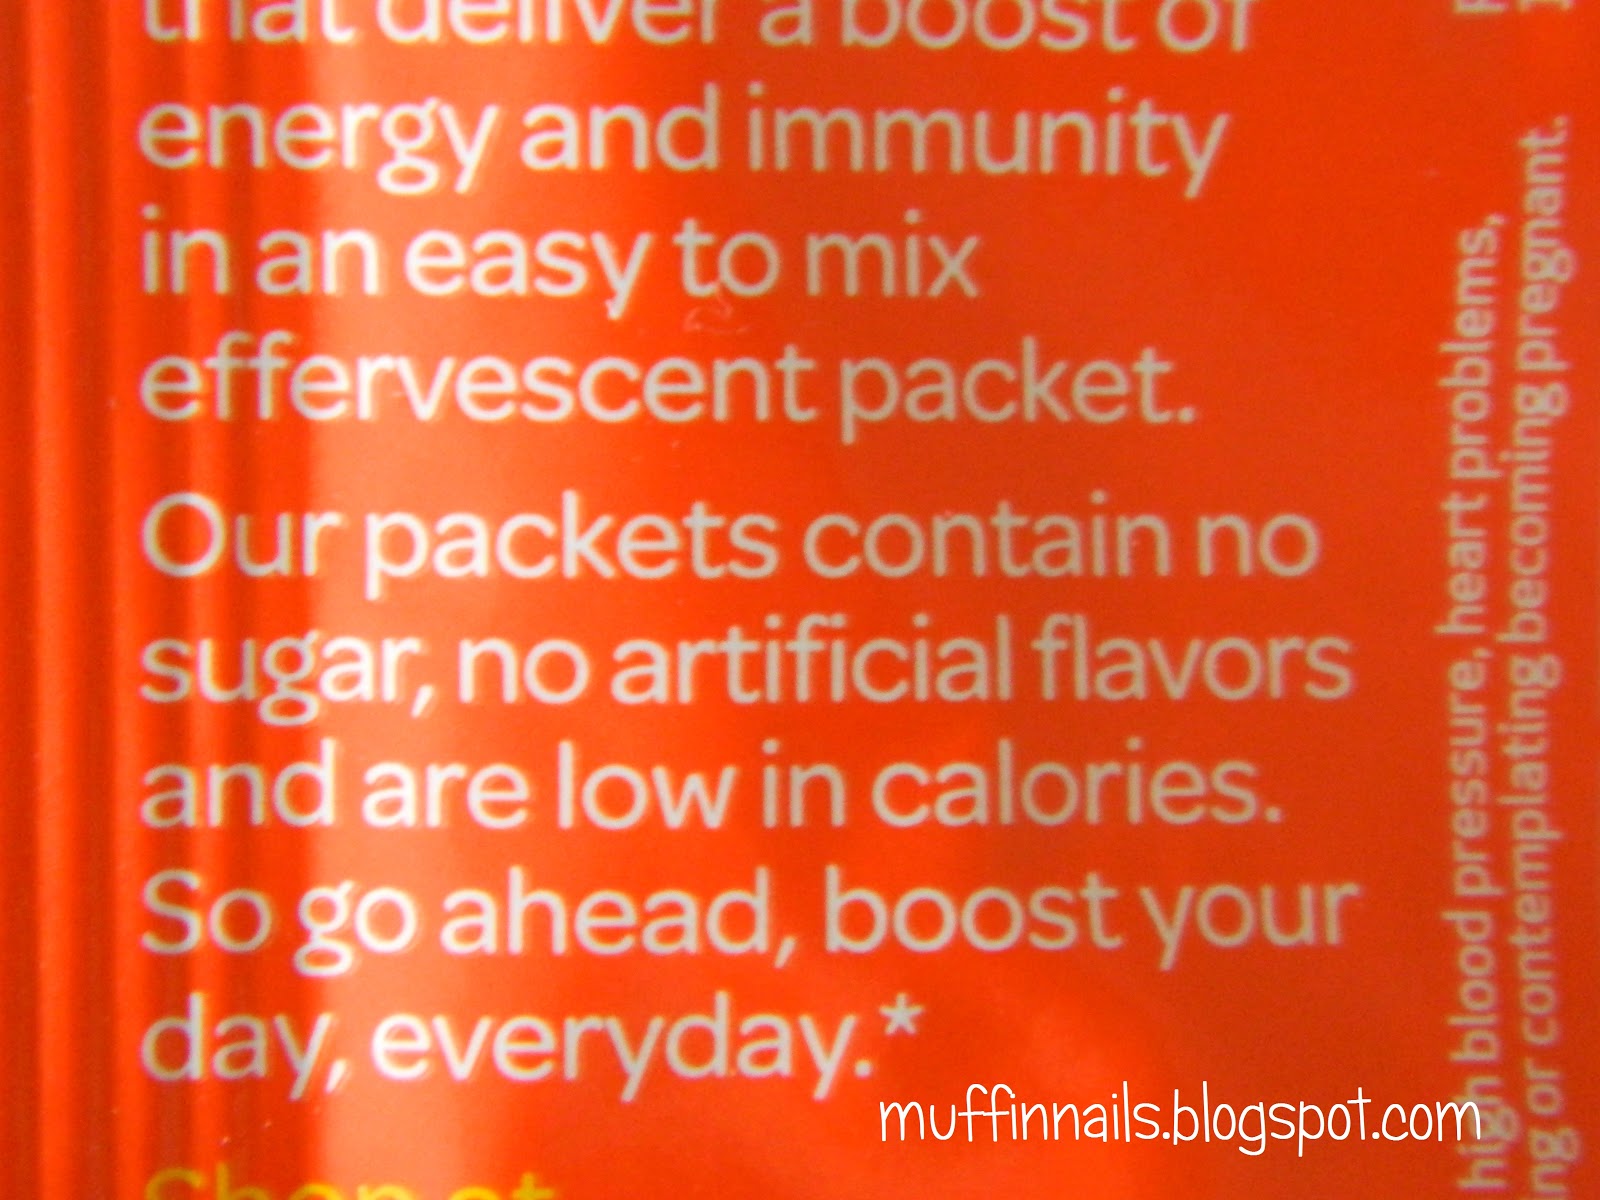
And here's my biggest complaint with this product. Read what the packaging says. "Boost  your day, everyday." It's every day! Didn't ANYONE notice the grammar mistake when proofreading the labels? There's a difference between "everyday" and "every day," people! Don't use the incorrect form on a professional package (okay, grammar rant over)! 

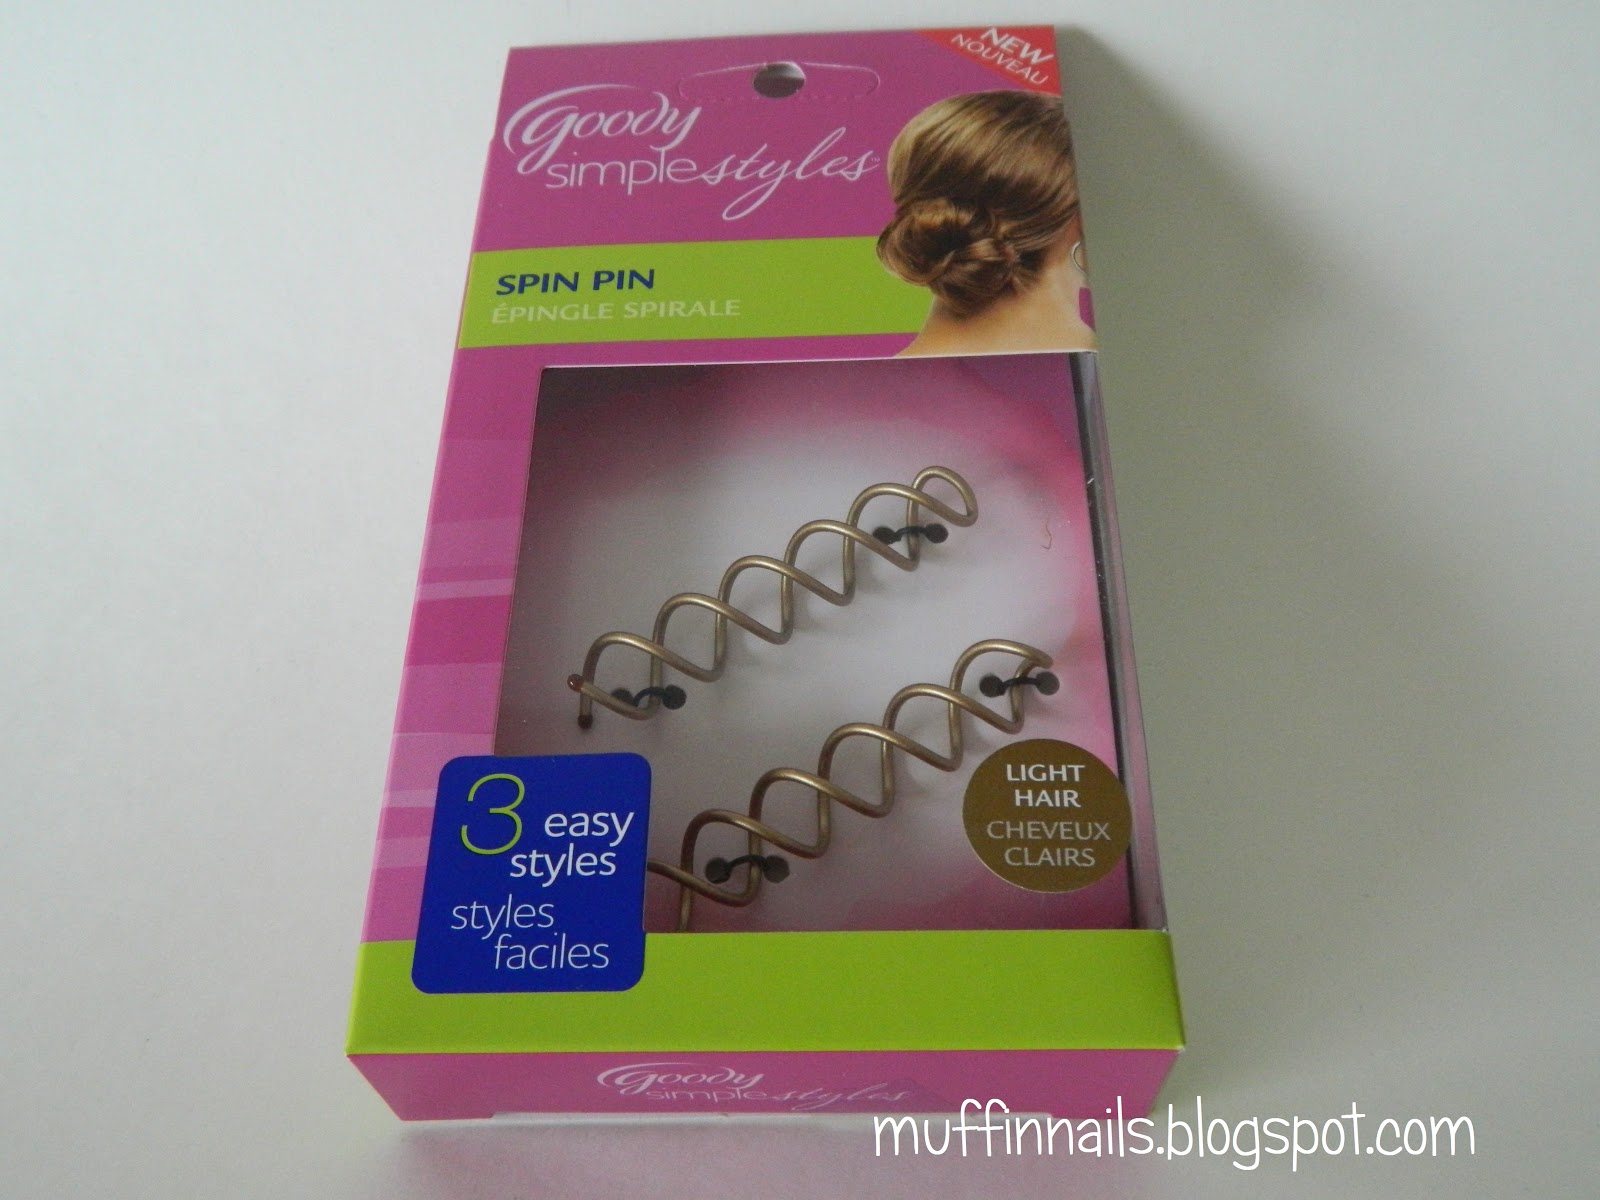
Goody Simple Styles Spin Pin
Retail Price: $7.29


I have to say, these are the most nifty little things I've ever seen. They're like little screws that you put on each side of a bun and twist clockwise to tighten and counterclockwise to unscrew. On the downside, though, my hair doesn't even reach my shoulders, so I had no luck using them. However, I tried screwing them into a tiny bun I made in my hair, and they don't come out unless you twist them. They don't fall out like bobby pins or hair clips. I do think that, even if I had long hair and hadn't received this product for free, there's no way I would buy this in stores. It's a brilliant idea, but I feel like $7.29 is WAY too much for two pins.

Nor Your Mother’s Kinky Moves Curl Defining Hair Cream
Retail Price: $6.00 for full sized 4-oz bottle


So at first, I was pretty disappointed about receiving this one. I have limp,  straight hair, and the most it curls is when my bangs curl out and look like little horns (much to my embarrassment). I decided to try it on my hair anyway; maybe it would magically make my hair beautifully curly? It didn't  But it DID leave my hair smelling amazing, so that’s a bonus! It was pretty greasy, though, and I had trouble washing it out, so I was just about ready to give up on it until the perfect situation cropped up last Saturday.
I was preparing to go to a party with a friend when she asked me if her hair would look nice if we curled it. Now, because I have hair that refuses to curl even with a curling iron, I NEVER have a chance to curl hair.  So I jump on the opportunity, grabbing my rarely-used curling iron from deep within my bathroom drawer, and start curling away.
I didn't want the curls to go limp halfway through the party, so I gave her hair a healthy coating of hair spray to keep it in place. And all of a sudden we've got problems. There are strands of hair sticking out, now practically glued in place. We can’t get the brush through it. It’s a tangled, yucky mess.
We have to leave in less than a half hour. No time for her to wash her hair or for us to straighten it out again. We’re in full-blown crisis mode now. She’s panicking. I’m panicking. Everyone’s panicking. And then I remember something- the hair cream.
I scramble to retrieve it from the next room and frantically squeeze a dollop onto my fingers and run it through her hair. And all of a sudden, the curls are beautiful.
No more tangles. No more frizz. This cream performed a  miracle. Her hair was perfect. I was ecstatic because the product worked; she was ecstatic because her hair wasn't a hideous mess. And the best part? Her curls lasted all night. Usually the curls go limp and are gone after a few hours, but these looked almost the same as they did at the very beginning.
So if you have curly hair, or like curling your hair, or some combination of the two, or whatever, I recommend this product. It’s magic. I swear. I intend on buying ever y single one of their products I can get my hands on after this experience. I know I received this product for free, but if you’re thinking about getting it, $6.00 is a complete steal for what you get. And I'm pretty sure that once you try this, you'll never stop using it.

Boots No. 7 Beautiful Skin
(Bonus Product)


And last but not least, I have the bonus product that was sent to "select members" "based on scores and demo  info." I have not idea what the heck those phrases mean, but it DOES mean I get an extra product! Woopie! I really loved the one on the right. It was moisturizing and didn't smell too bad, and it didn't leave my face feeling greasy, which I HATE. The cleansing balm one was a little bit more strange. You're supposed to rub it in and then wipe it off with a warm, damp washcloth. Now, I don't exactly have the longest attention span, and so I decide to leave it in for a few minutes and then usually forget about wiping it off.

 And that's about it! I hope you guys enjoyed reading my reviews. If you recieved the VoxBox too, or have tried any of these products yourself, let me know what you thought about them! If you haven't tried any of them, which one do you think sounds the best?
If you liked this post, make sure to stay tuned for the next one by following here, on Facebook, and on Twitter.
xoxo,
Muffin


Wednesday, October 17, 2012

Stone Manicure

Today I'm trying out one of those ideas I've had in my head for a while but never actually got around to doing (until now, of course). When I was a little kid, I loved collecting rocks, and I thought the ones with the little veins running through them were the most beautiful. I tried to represent that look in this week's manicure.  Here goes!

You will need:
- a basecoat
- a base color of your choice (try to avoid neons and extremely dark colors)
- grey/silver/etc. polish
- Chapstick/Vaseline
- sponge
- top coat


Start off with your basecoat - you know the drill!
Next, paint on the color of your choice. Make sure to let it dry COMPLETELY before moving on to the next step.
Am I the only one who loves this color? It's "perfectly" named Perfect Plum. It's a tad darker than it appears in the picture, but it's still a gorgeous color.
I also want to apologize for the food coloring stain on my ring finger. I noticed after I painted my nails, and didn't really want to spend ten minutes scrubbing it out.

Sally Hansen - Perfect Plum

Next, take out the sponge. And yes, you heard me right. Sponge. There are no typos- I don't mean makeup sponge. I mean regular-kitchen-cleaning-sponge. Sponge. If it's really dry, moisten it with water and wring out as much as you can. Some extra water won't hurt, but if it's dripping water it's going to mess up your design.


Before you start this part, rub some chapstick (or Vasaline) around your cuticles. This will make any polish that ventures onto your skin easy to remove. Make sure to clean up any that gets on your actual nails.
Time for the fun part! Get out your grey polish and paint it onto a nail-sized section of the sponge (like in the picture below).


Take the sponge and roll the grey polish lightly onto the nail. What I mean by 'roll' is start at one side of the nail with the sponge and slowly tilt it LIGHTLY until the sponge has touched every part of the nail. Don't move the sponge on your nail, however, or you'll just smudge it. And just to make things clear, I said lightly.
Lightly.
Read the word above ten times before you do anything.
Lightly.
This is critical to getting the design to work out. If you press the sponge too hard, you'll get too much polish on the nail and lose that vein-y look you're going for.

China Glaze - Stone Cold

Taa-daa!
And here's a closeup:


We've had terribly rainy weather these past few days, so I held off as long as I could (there was a POSSIBILITY the rain would stop suddenly and the sun would appear, right?). I needed to get this post up, though, so I'll be adding my pictures of the clean, top-coated (yes, I just made top coat a verb) once this darned cloudy weather goes away.

In the meantime, why don't you head on over to my Facebook page and like it, Twitter to follow, or just follow through GFC here.
Thanks for reading!
- Muffin

Tuesday, October 9, 2012

Chain Nails

Did anyone get the pun I tried to make with the title? No? Chain mail = chain nail? Darn, and I was feeling pretty clever with that one. Bad puns aside, for my second Halloween-themed tutorial I decided to go with something often associated with those creepy ghosts in Charles Dickens' A Christmas Carol - chains.

You will need:
- Base coat
- Black polish
- Orange/Halloween-themed glitter
- white striper
- black striper (optional)
- top coat

Start off with a base coat, and then paint all of your nails black.

Sally Hansen - Black Heart

Now, that would be kind of boring on its own, right? You know what that means... add glitter!

Kleancolor - Chunky Holo Poppy

This picture isn't really important to the post in any way, but I just had to show you how gorgeous this color is. Seeing it change colors as you turn your fingers is really fun.


Next, draw little squares/rectangles in a row on each nail using the white striper.

LA Colors Art Deco brush - White

Still using the striper, connect the chain pieces together.


If you want some extr detail, you can use the black striper to draw the lines in the chains, as I did on the pinky. I wasn't satisfied with how it turned out, though, so I ended up not doing it on the rest of my nails.

It's So Easy Stripe Rite - Black 

Here's the finished product (sort of). Silly me went and sumdged the polish beyond repair before I was able to add a top coat and clean up. You'll just have to use your imagination, I guess. *sigh*


 I hope you all enjoyed October's second Halloween tutorial. This one is extremely simple and can be done by all levels. If you want to see my upcoming not-so-spooky tutorials, stay tuned by following Muffin Nails here, on Facebook, and on Twitter.
Thanks for reading!
- Muffin


Tuesday, October 2, 2012

Spider Web Nails

It's OCTOBER, guys! And you know what that means... it's time for... 
Halloween nails! *cue the flickering lights and evil laughter*

Okay, so the nails I'm doing today aren't very scary, even I'll admit that, but they're extremely easy and totally fit the Halloween theme! Thanks to PolishNV and Erica's Nails and More for suggesting today's design: *drumroll* spider webs!


For this design, you'll need:
- Base coat
- Black polish
- Second Halloween-ish color (I used green, but purple and orange are also great)
- White polish with a nail art brush OR a white striper (you can use a toothpick, but it doesn't work too well for this design due to all of the detail work)
- another color for the spider
- red polish
- top coat

You know the drill - start off with that base coat again! Then paint your nails solid black.


Add a gradient to the tip of your nails with a makeup sponge, using whatever Halloween color you chose (I used green here, but you don't have to). This doesn't have to be perfect because you'll be painting over it later.


Using the striper or white polish and a brush, make a small dot on a random place on each nail. Then draw lines coming from the dot. Make a flicking motion with the brush to get lines that get slightly smaller as they get farther away from the center.


Now start on the web. Make little semi-circle-outline shapes in between each line. They should form a little circle-like thing that looks a bit like a bike wheel.


Continue with these lines until you've completed each nail. Try varying the distance between each one to give it a torn, old cobweb look.


You can stop there and add a top coat, but I felt like something was missing. But what was it...?


Spiders, of course! Just use the brush to make a little oval on the nail and use a toothpick or nail art brush to draw the legs. I know spiders have eight legs, but I ran out of room for the last two... shh... no one will notice.


Use the toothpick to draw two little red eyes.


And there you have it! Quick and easy spider webs, and a friendly little spider as well!


Halloween is weeks away, but that's no reason to wait. Get started on your October nails now, and decorate your nails with these simple, fun cobwebs to get in the spirit of the season. If you liked this tutorial and want to see what other spooky designs I have in store for the month, don't forget to follow Muffin Nails here, on Facebook, and on Twitter!
Thanks for reading! 
- Muffin