Showing posts with label OPI. Show all posts

Saturday, September 15, 2012

Nail Art Challenge Day One: Favorite Color


So today is the first day of Erica's Nails and More's ten-day nail art challenge. The prompt for today is *dun dun dun dun* favorite color!


Here's the list of the prompts for each day. Pretty fun, huh?

So without further ado, here's my design for day one:
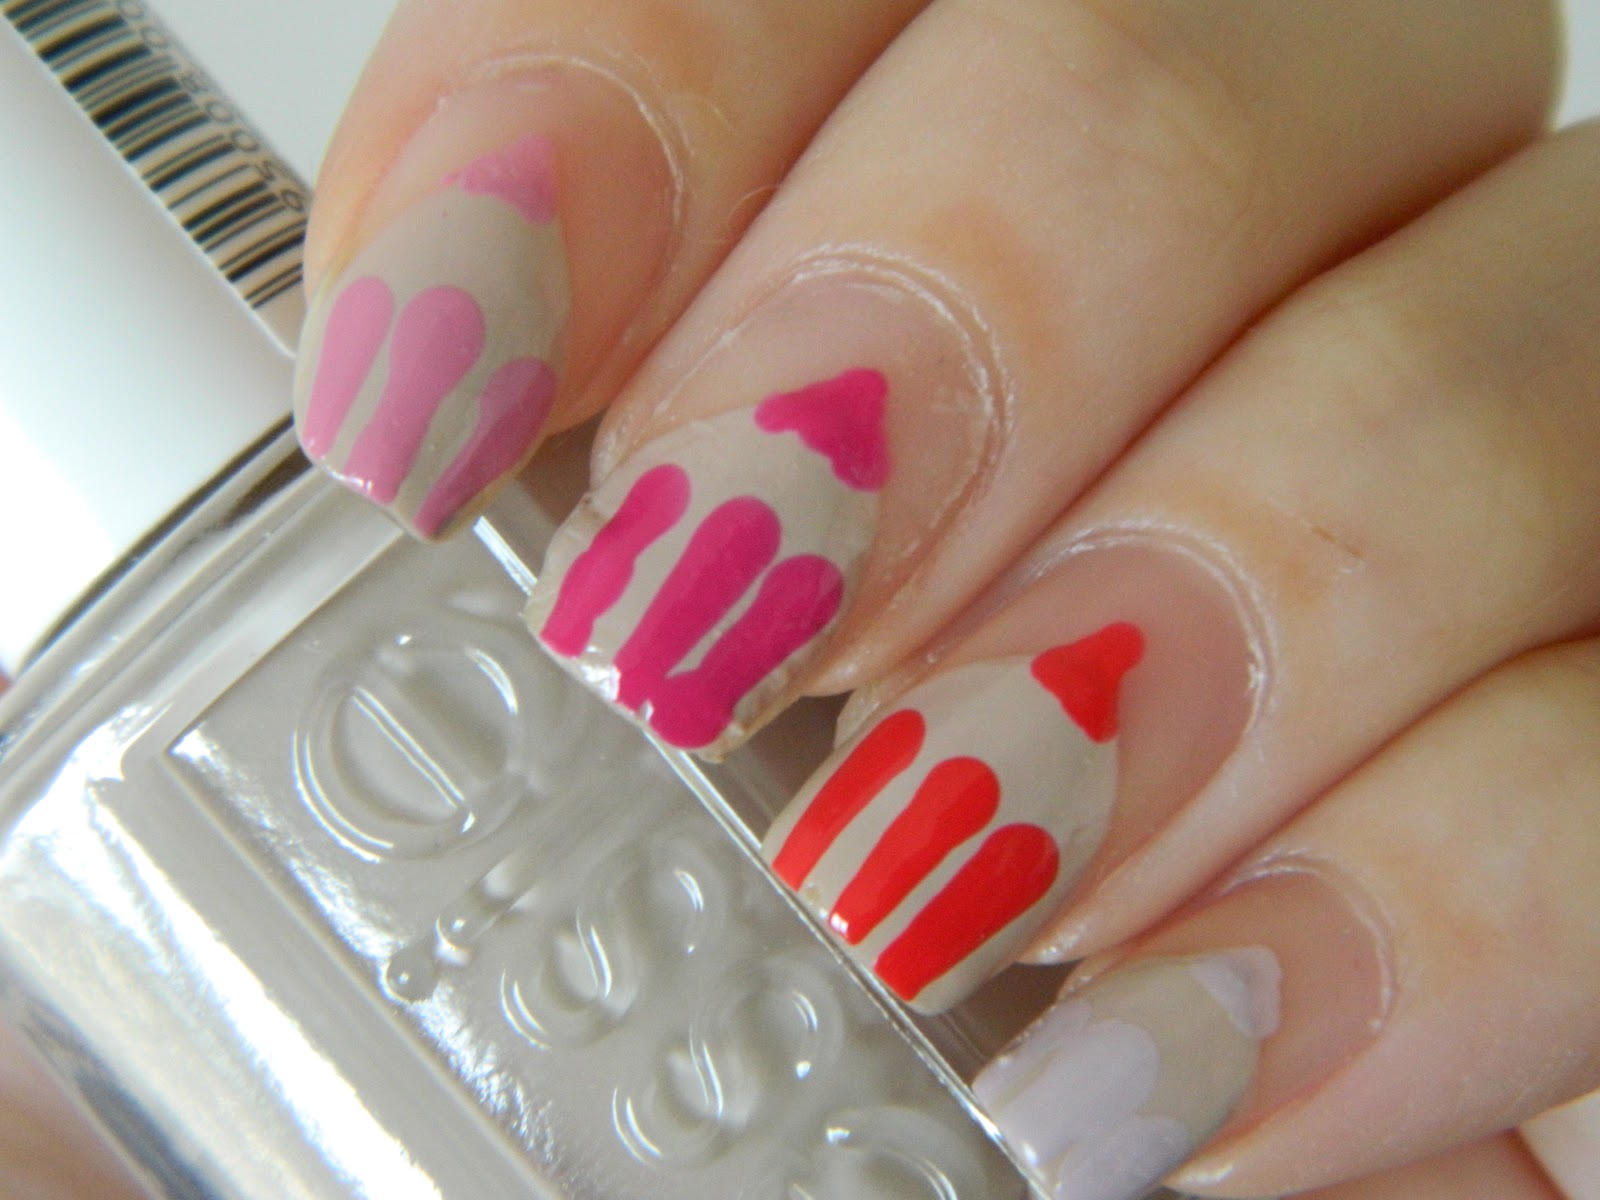

My favorite color is actually orange, but for some reason I have almost no orange polish. I decided to go with my favorite polish color, which is my beautiful OPI Cajun Shrimp. I picked out a bunch of other reds and pinks and used them together in my design.

A while back I was planning to do a pencil design tutorial, but CutePolish beat me to it. I decided to change it up a bit today to incorporate my favorite color by turning them into colored pencils!

This morning I was all nice and set to paint my nails, when all of a sudden the patch on my middle finger decides to start tearing (see this album to look at the terrible tear beforehand). I had to spend more than fifteen minutes soaking off the nail glue with acetone (which really made me grimace - I never use real acetone unless I have to) and then another 15-30 minutes applying another tea bag patch.

Finally everything dried and I was all set to go. The painting didn't take too long (it was much easier than I expected) but at the end I realized that my cuticles were a dry and crusty mess. This meant another half hour or so waiting for the polish to dry, and then the time it takes to apply some cuticle cream. The edges of my patch really looks like crusty cuticles, which is going to drive me crazy, but there's nothing I can do to fix it.

I grabbed my handy dandy oh-so-wonderful Burt's Bees lemon butter cuticle cream and went to work. Have I ever mentioned how much I love the smell of this stuff? It's like heaven in a little tin.

Finally, I was FINISHED! *cue applause* and then it was time for pictures!

I think this went pretty well. My colored pencils look a bit like cupcakes, which kind of annoys me, but when  I decide to paint cupcakes on my nails I'll already know what to do. The color on my pinkie didn't show up as well as I wanted to, but you know, you live and learn, right?

Here are some more pictures:

Close-up time!

I really think I'm improving at taking pictures of my
manis without holding a bottle of polish in them!

These weren't supposed to be upside down.
Woops.

Sideways-ish picture. Just because I felt like it.

Both left and right hands. I'm glad you can't see the right
hand too well, because it just turned out... bad.

Heh. Get it? I'm holding a pencil. With pencil nails.
This idea sounded so much cooler in my head.

Here are all of the polishes I used:
Base coat: Beauty Secrets Ridge Filler
Pencil Base: Essie - Sand Trapez
Thumb: Sinful Colors - Gogo Girl
First finger: OPI - Sparrow Me the Drama
Middle finger: Sinful Colors - Boom Boom
Ring finger - OPI - Cajun Shrimp
Pinkie: OPI - Steady as she Rose

If you liked this post, stay tuned for the rest of the challenge! Don't forget to follow me here, on Facebook, and on Twitter. And please head on over and follow the most talented Erica on her blog and on Facebook.
Thanks for reading!
-Muffin

Tuesday, August 21, 2012

(A Sort of) Splatter Nails

Hello all! I feel so bad about forgetting to post yesterday, so I will try to make this one as wonderful as possible! I really enjoyed this design, not just because it was easy and quick but because it was just... cool. I hope you all like it as much as I did!

I wasn't quite sure what to call these, so  I settled on splattered nails. They're not quite spun-sugar but not fully splatter. Oh well.


You will need:
- Base coat
- white polish
- three other colors of polish (here I'll call them polish A, B, and C)
- an index card
- a toothpick
- Chapstick (optional)
- a top coat (optional)

Start of with a base coat. Next, paint your nails two solid coats of white.
If you'd like to experiment with this technique, you could try a black background, or go totally crazy and choose neon green or something!

Sally Hansen - Hard to Get

This step isn't necessary, but is extremely helpful. Rub a little chapstick into your cuticles and the skin around each nail to make cleanup loads easier at the end. Make sure not to get any on your actual nails.


Place a small dot of color A on an index card. Use the toothpick to mix it around until it gets nice and stringy.


Using the toothpick, drag the polish across the nail. It should form little strings and you'll be able to pull it across. If it's not working, try putting a tiny dot on your nail with the toothpick and just drag from there. Do this for the first one-third of the nail. 

OPI - Sparrow Me the Drama

Repeat with Color B on the second third of your nail.

Sinful Colors - Boom Boom

Finish up with color C on the last empty portion of each nail.

Sally Hansen - Perfect Plum

You can finish up with a top coat, but I really loved the texture on this one, so I skipped that step. If you would like to use a top coat, start with one going horizontally across the nail to prevent smearing and then complete with a second one going the normal direction. When everything is dry, you can wipe off the chapstick with a tissue and almost all of the polish you got on  your skin will rub off!

I hope you liked this tutorial! This design is great for that day that you don't have time to do something intricate, but really want your nails to stand out. If you enjoyed reading this, please follow my blog on the right, on Facebook, and on Twitter.
Thanks!

Monday, July 30, 2012

Olympic Nails

Hey, guys! So the Olympics started on Friday, and it's time to celebrate that with some Olympic-themed nails. This design is easy, fun, and sure to draw attention. Keep reading to learn how to celebrate your country and the Olympics with pride!

You will need:
- Base coat
- White polish
- blue polish
- yellow polish
- black polish
- green polish
- red polish
- nail striper brush
- gold polish
- top coat

As usual, start of with a base coat. Next, paint your ring fingers and thumbs solid white, and the rest of your fingers with white french tips.

Sally Hansen - Timeless White

Now, place a small drop of the blue polish on a piece of paper. Dip the tip of the striper brush into it and use it to make a line on the nail, as shown. Do this for all french-tipped nails.

Sally Hansen - Blue Me Away!

Repeat this with all five colors. Start each color from the same point and spread it out at the end, to get a fan-like look.
This design is meant to represent the colors of the five Olympic Rings.

Yellow: Sally Hansen - Lightening
Black: Sally Hansen - Black Heart
Green: Essie - Mojito Madness
Red: OPI - Cajun Shrimp

Now you'll move to the fully painted nails. Use the blue polish to make a  V-shape on the nail. You can do this with the actual brush or with a toothpick/striper if you feel like it. Then Take the gold polish and make a small semicircle on the tip of the nail, like shown. This is how you'll achieve the look of the Olympic gold medals.

Sally Hansen - Blue Me Away!
China Glaze - Harvest Moon

And there you have it! Don't forget to finish with a top coat. 


So decorate your nails with a design that will take home the gold this year, and show off your Olympic pride! Let me know what you think about this tutorial by commenting below, and don't forget to follow my blog, 'like' Muffin Nails on Facebook, and follow on Twitter.
Thanks for reading!

Monday, July 23, 2012

Summer Dragonflies

Today I'll be showing you how to easily recreate a common sighting on a summer evening- the dragonfly. It's placed over a sunset above water. I hope you like it!

You will need:
- Base Coat
- Makeup sponge
- Pink polish
- Yellow polish
- Orange polish
- Red polish
- blue polish
- black polish
- dotting tool
- various-sized beads

Paint your nails with a base coat and cover that with one coat of pink. It doesn't have to be perfect because most of it will be covered by the other colors. Sponge on the yellow polish, leaving only a small portion of pink showing near the base of the nail.

OPI - Sparrow Me the Drama; Sally Hansen - Lightening

Now sponge on the orange polish, leaving a little of the yellow showing.

Sally Hansen - Sun Kissed

Repeat the process with the red polish.

OPI - Cajun Shrimp

Use a dotting tool to paint on the blue polish, making it in the shape of waves.
Sally Hansen - Blue Me Away!

Use your dotting tool and the black polish to create the dragonfly's wings.

Sally Hansen - Black Heart

Place a drop of top coat in the middle of the wings and  place the larger bead.


Use one smaller bead for the head and two for the body, using the top coat to act as the glue again.


And there you have it! Just cover with a top coat to protect the design. The beads will easily come off when soaked in acetone.
I hope you enjoyed this designs! Please leave your comments below and on Facebook!


Monday, July 16, 2012

Watermelons

Hello all! This week I'm posting a tutorial for a very summer-inspired design that will teach you how to decorate your nails with mouth-watering watermelon slices. Enjoy!

You will need:
- Base coat
- Red polish
- dark green polish
- black polish
- dotting tool
- light green polish
- top coat

As usual, paint your nails with your favorite base coat. Next, use the red polish to cover your nails with two solid coats.

OPI - Cajun Shrimp

Next, paint the tips of your nails with the darker green polish. You can do this freehand or use tape.

Essie - Mojito Madness

Use the black polish and a dotting tool to draw on the watermelon seeds. This can also be done with a black striper.

Sally Hansen - Black Heart

Using the edge of a makeup sponge, dab on the light green nail polish onto the tips of the nails in stripes (like in the picture). This is a subtle step that really adds to the design.

Essie - Navigate Her

And there you have it! Cover with a top coat to protect your design.

Sally Hansen Strengthening Top Coat
Thanks for reading! Please write your questions and comments below and don't forget to follow me here and on Facebook!

Monday, July 9, 2012

Pink Polka Dots

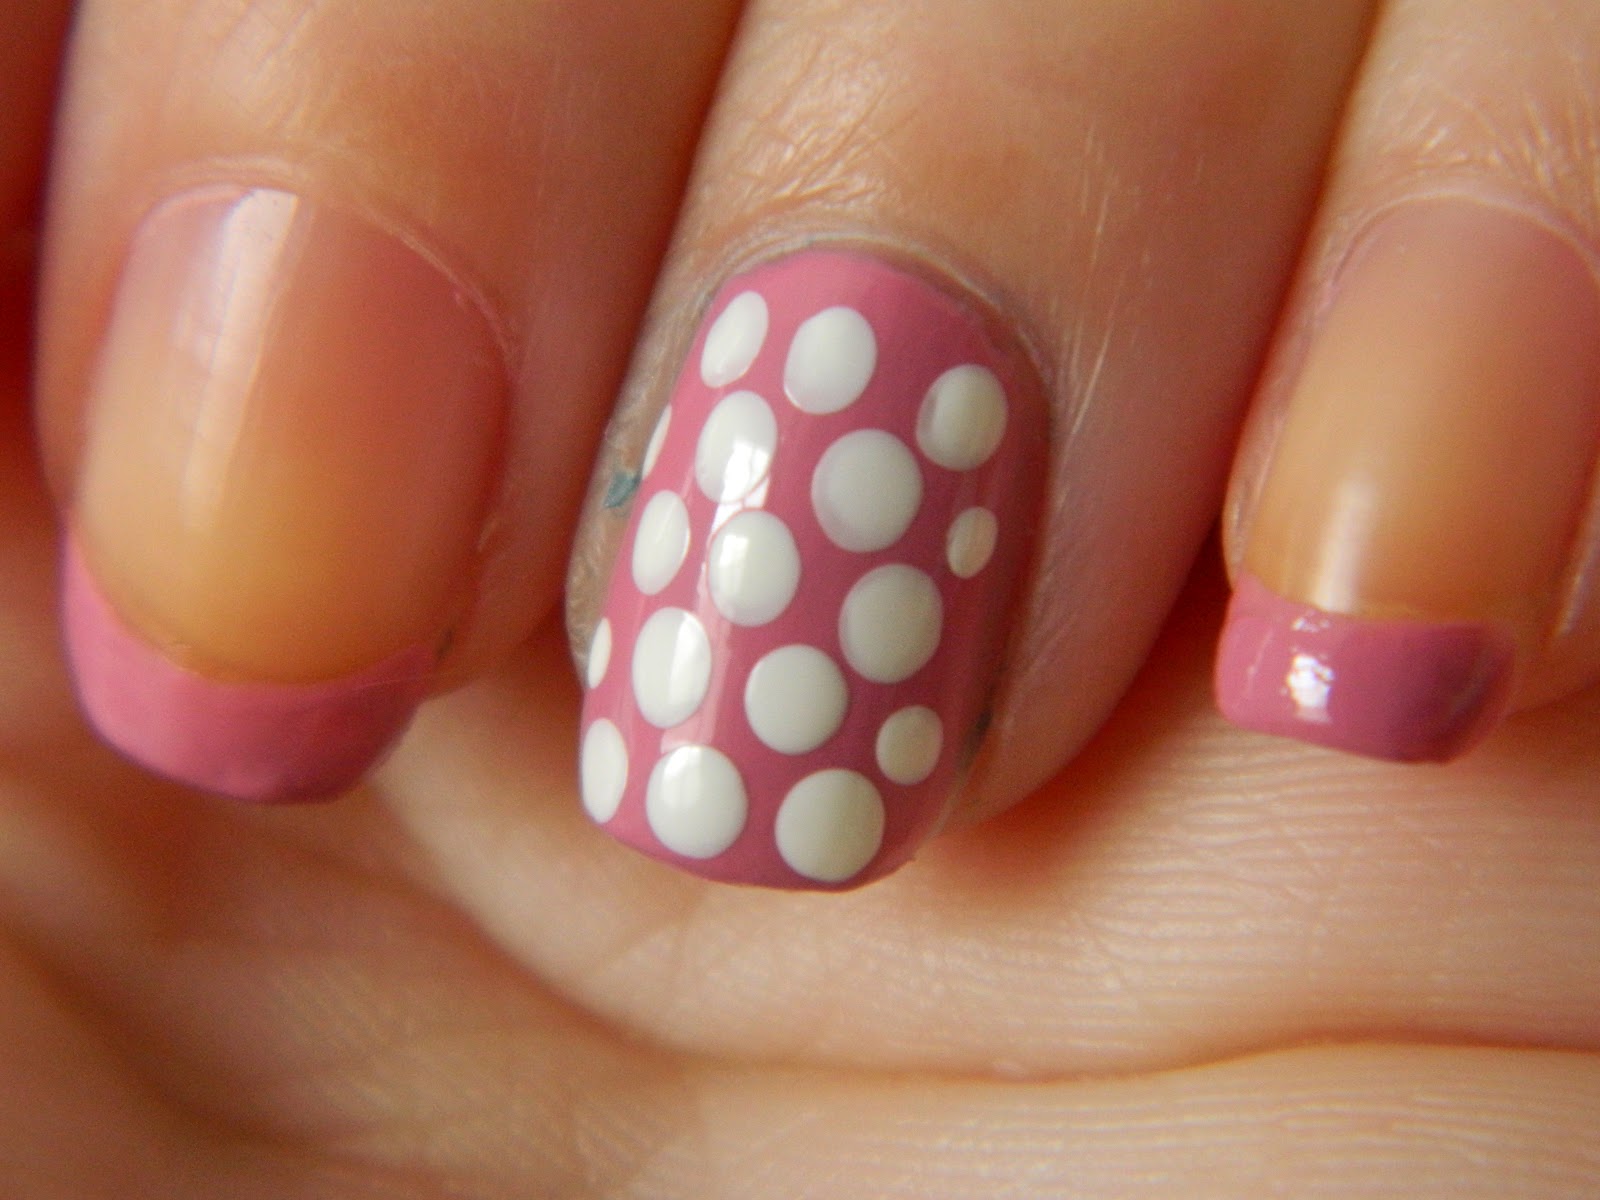
Hello, nail world! Today I decided to go with something simple and sweet. In this tutorial I'll show you how to combine the fancy french tip with cute and fun polka dots. Enjoy!

You will need:
- Base coat
- Pink polish
- Dotting tool
- White polish
- White striper
- Top coat

As usual, paint all nails with a base coat. Next, paint your thumb and ring finger solid pink and paint just the tips of the pointer, middle, and little fingers. 

OPI - Sparrow Me the Drama

Next, use your dotting tool to create polka dots using the white polish on the thumbs and ring fingers.

Sally Hansen - Timeless White

Take your white striper and outline each of the french tips.

It's So Easy Stripe Rite - White

Cover with a top coat.


Thanks for reading! This simple nail design is easy, professional, and sure to be a hit.
If you liked this tutorial, please follow my blog and like it on Facebook. 


Tuesday, June 19, 2012

Spiffy New Polishes

I happened to have an extremely lucky week in terms of nail polish haul and thought I would share what I found with you. 

First, I took a trip to Sally Beauty Supply to pick up a new top coat and a white striper. Here's what I ended up with! China Glaze's Hunger Games Polishes were all on sale, so I snatched three of them for just $3.29 each.

L-R: China Glaze - Smoke and Ashes,
Electrify, Foie Gras

I also found a gorgeous navy polish by China Glaze, which I had to get because I don't find many blues that I like. It's much lighter than it appears in the picture. I also found my new top coat, along with the striper. I forgot to take a picture of it, but I also got a ridge sealer to help fix up my poor nails.

L-R: China Glaze - First Mate, Northern Lights Hologram
Top Coat Silver,  It's so Easy Stripe Rite - White

I was also finally able to get my hands on some nail glue. I am already in love with this kit, and the once-chipped tips of my nails are now perfectly smooth thanks to this. 

Orly Nail Rescue Kit

And yesterday, you'd never guess what I recieved! More polish! This was all from a family friend who had some extras she didn't need. First are some amazing pale pink-purple colors.

L-R: OPI - Steady as She Rose,
Sparrow Me the Drama
 I also got some new shatter polishes:

L-R: OPI - Silver Shatter, Red Shatter
 This package happened to come with another top coat, so I have a bunch of different ones to use now! The other polish in the picture is a spiffy pearly white that I am DYING to try out.

L-R: Sally Hansen Strengthening Top Coat,
Pure Ice - Platinum

So all in all, I think I've had a pretty good week nail polish-wise. A bunch of these are going to be included in my upcoming tutorials, and I'm excited to try them all out. Are there any of these you'd like to see in my next tutorial? Tell me below! And don't forget to follow!

Monday, June 4, 2012

Color Blocking


Hey all! Happy Monday!
Color blocking is becoming extremely popular, so I thought I'd post a tutorial about it. This is also the base for a second nail design, which I will post after I get this one up. You will get better results using tape in this design, but it's very time consuming so if you're short on time I would suggest attempting it freehand. 

You will need:
- Base coat
- light green polish (yes, I know I've used the same color three weeks in a row... I promise this is the last time!)
- yellow polish
- light blue polish
- topcoat

Paint on a base coat and apply two coats of the green polish.

Essie - Navigate Her

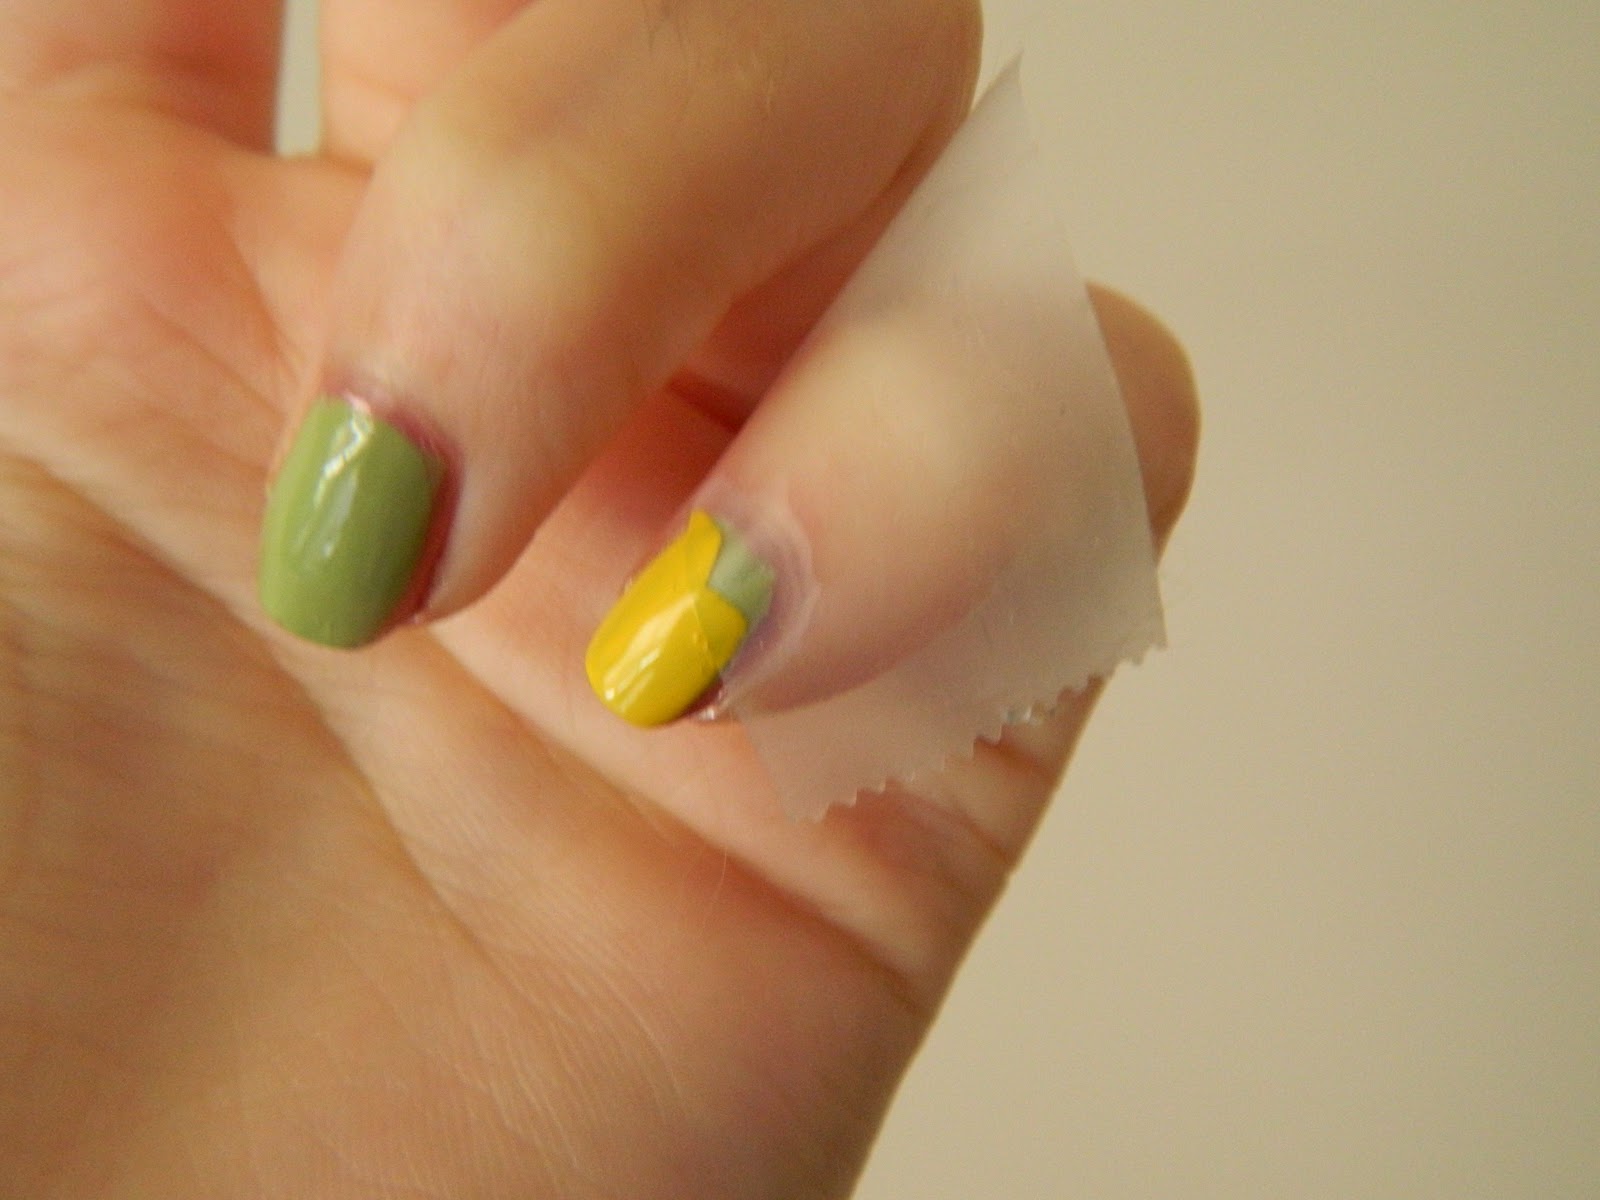
Let this dry completely and place a piece of tape running from the middle of one side of the nail to the bottom corner of the other (such as in the picture).


Paint the part of the nail not covered with tape.

Sally Hansen - Lightening

Quickly remove the tape. Repeat for all nails and let dry completely.


Now take another piece of tape and place it from the middle of one side of the nail to the top corner of the other side.


Paint the nail with the blue polish.

Nicole By OPI - My Lifesaver

Remove the tape quickly.


Cover with a top coat to protect your design.

L.A. Colors - Base coat / topcoat


I hope you enjoyed this design! Read the next blog post if you'd like a way to add even more fun to the design.
Thanks for reading!